Install WooCommerce Plugin
This guide provides step-by-step instructions on installing and configuring PayRex's WooCommerce plugin on your WooCommerce store.
WooCommerce is an open-source e-commerce plugin for WordPress that lets businesses create and manage online stores. It supports product listings, payments, shipping, taxes, and extensions, making it flexible for small to large online sellers.
Prerequisites
Before proceeding, ensure that you have the following:
- A WooCommerce store
- A PayRex merchant account. If you don't have access to a PayRex merchant, check this guide first. If you should be part of an existing PayRex merchant account, please ask your administrator to invite you.
Installation
Installation through Wordpress Plugins module
If you can still see this card, you cannot search our plugin via WordPress plugins yet. The plugin is still pending approval from the WordPress team. We will update this section once you can search our plugin. In the meantime, manually install our plugin.
Manual Installation
The manual installation method involves downloading our plugin and uploading it to your web server.
- Download the zip file version of our plugin. Click this link to download
- Access to your wp-admin and click Plugins from the sidebar.
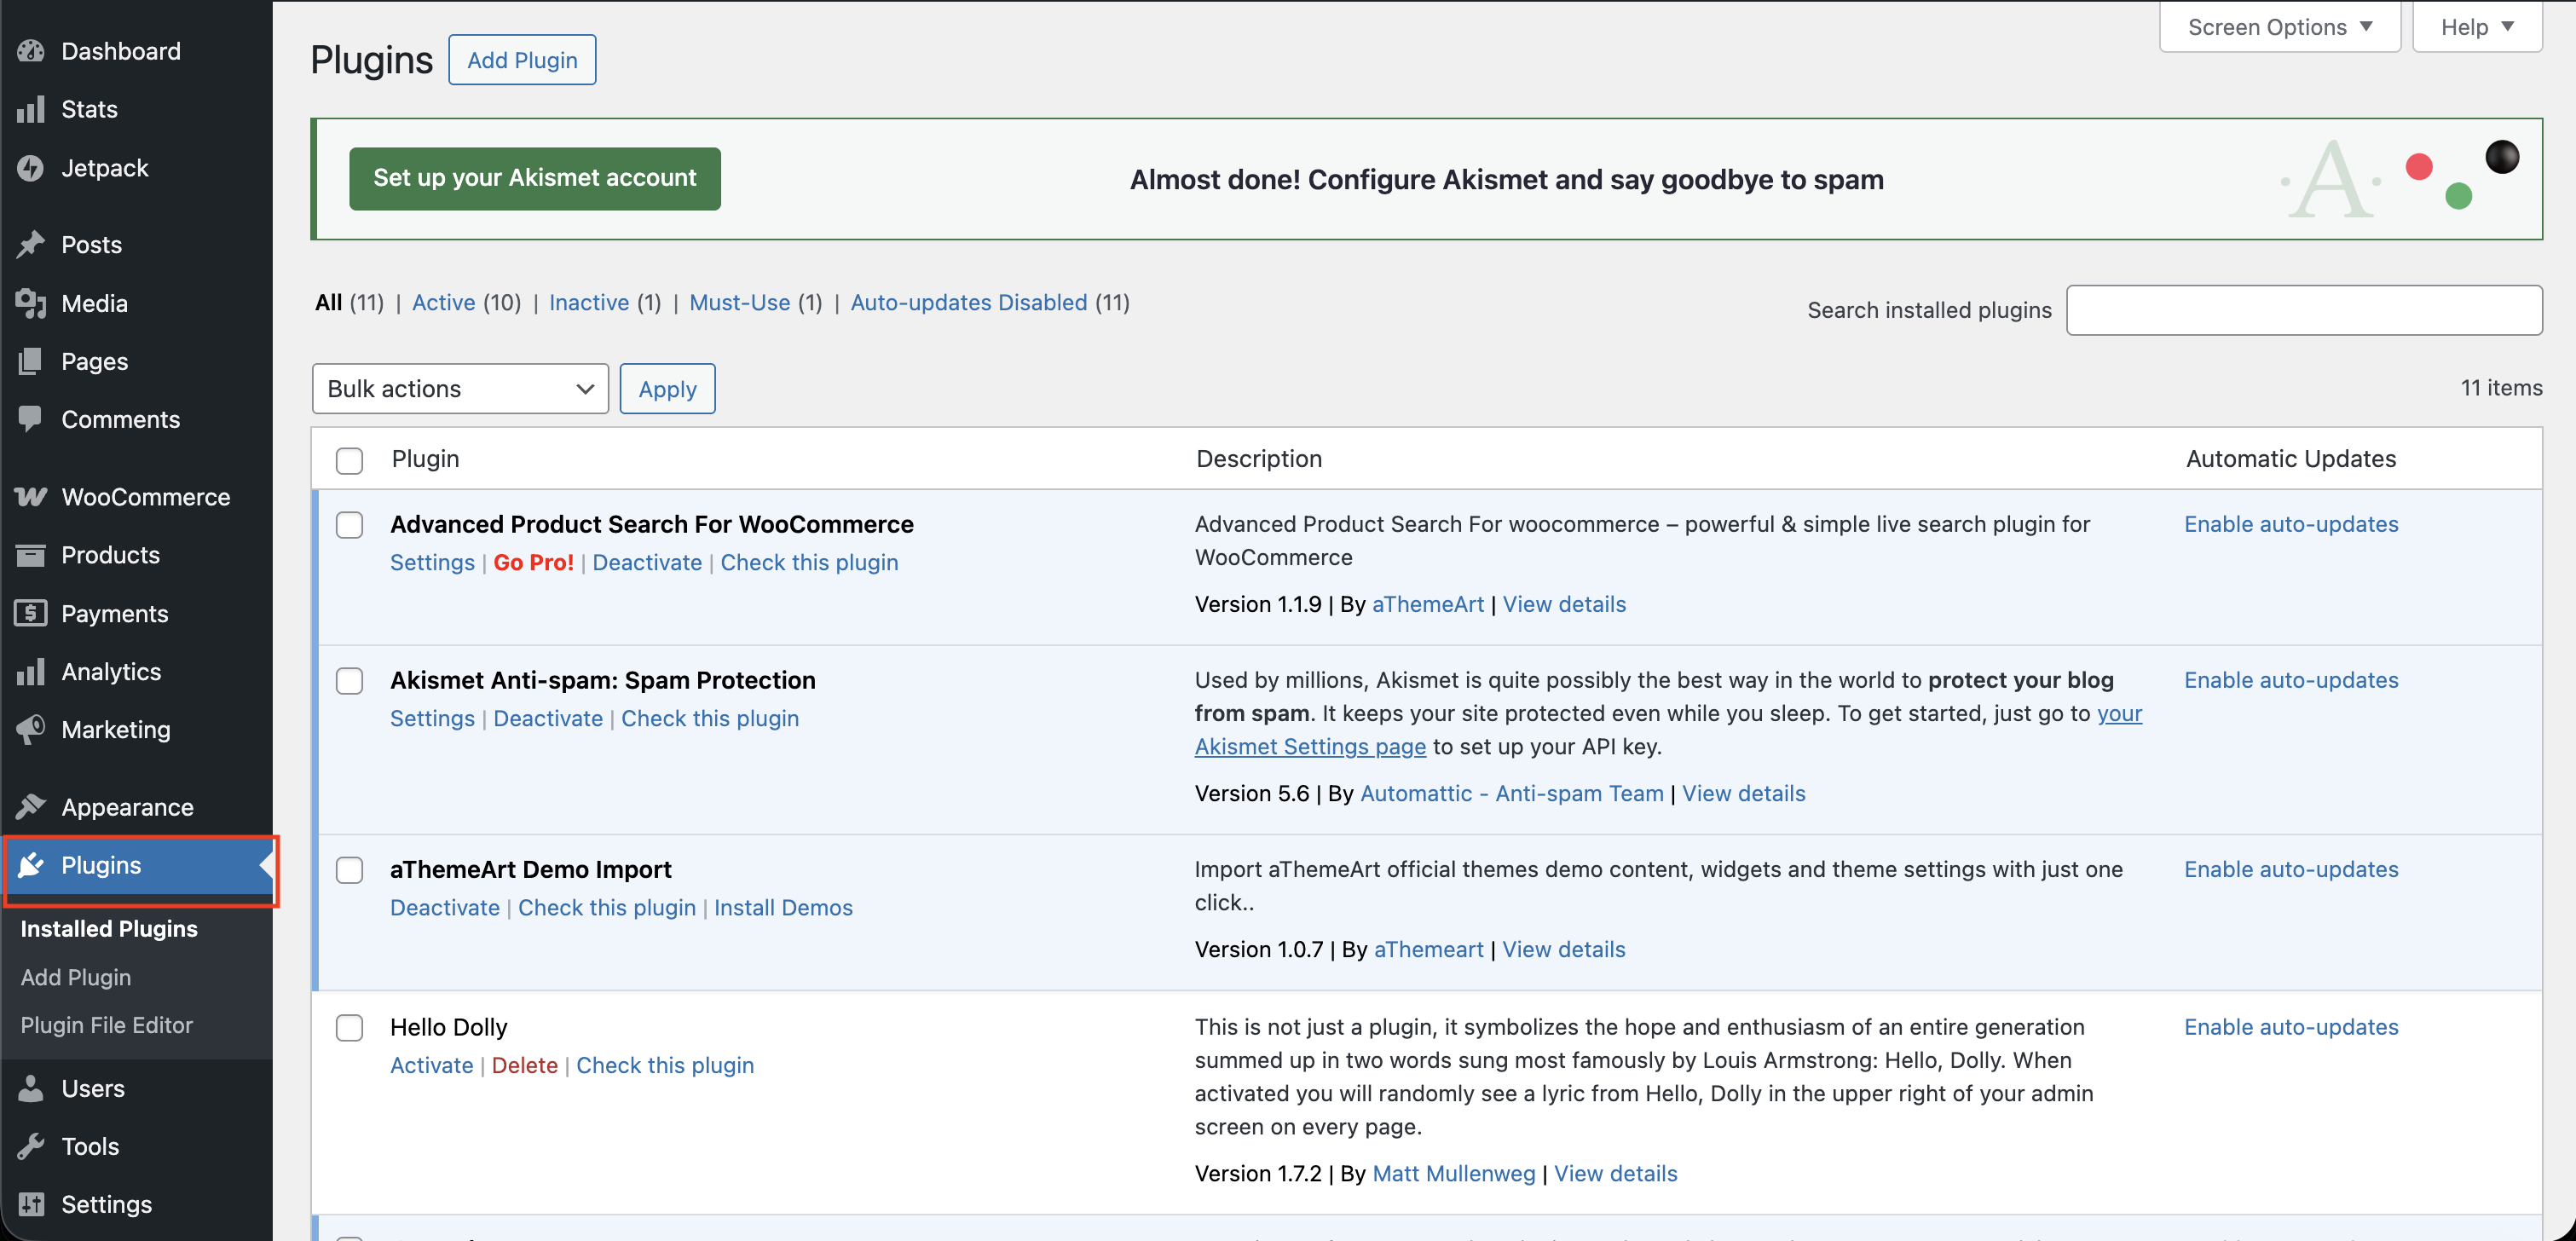
- From the plugins module, click Add Plugin.
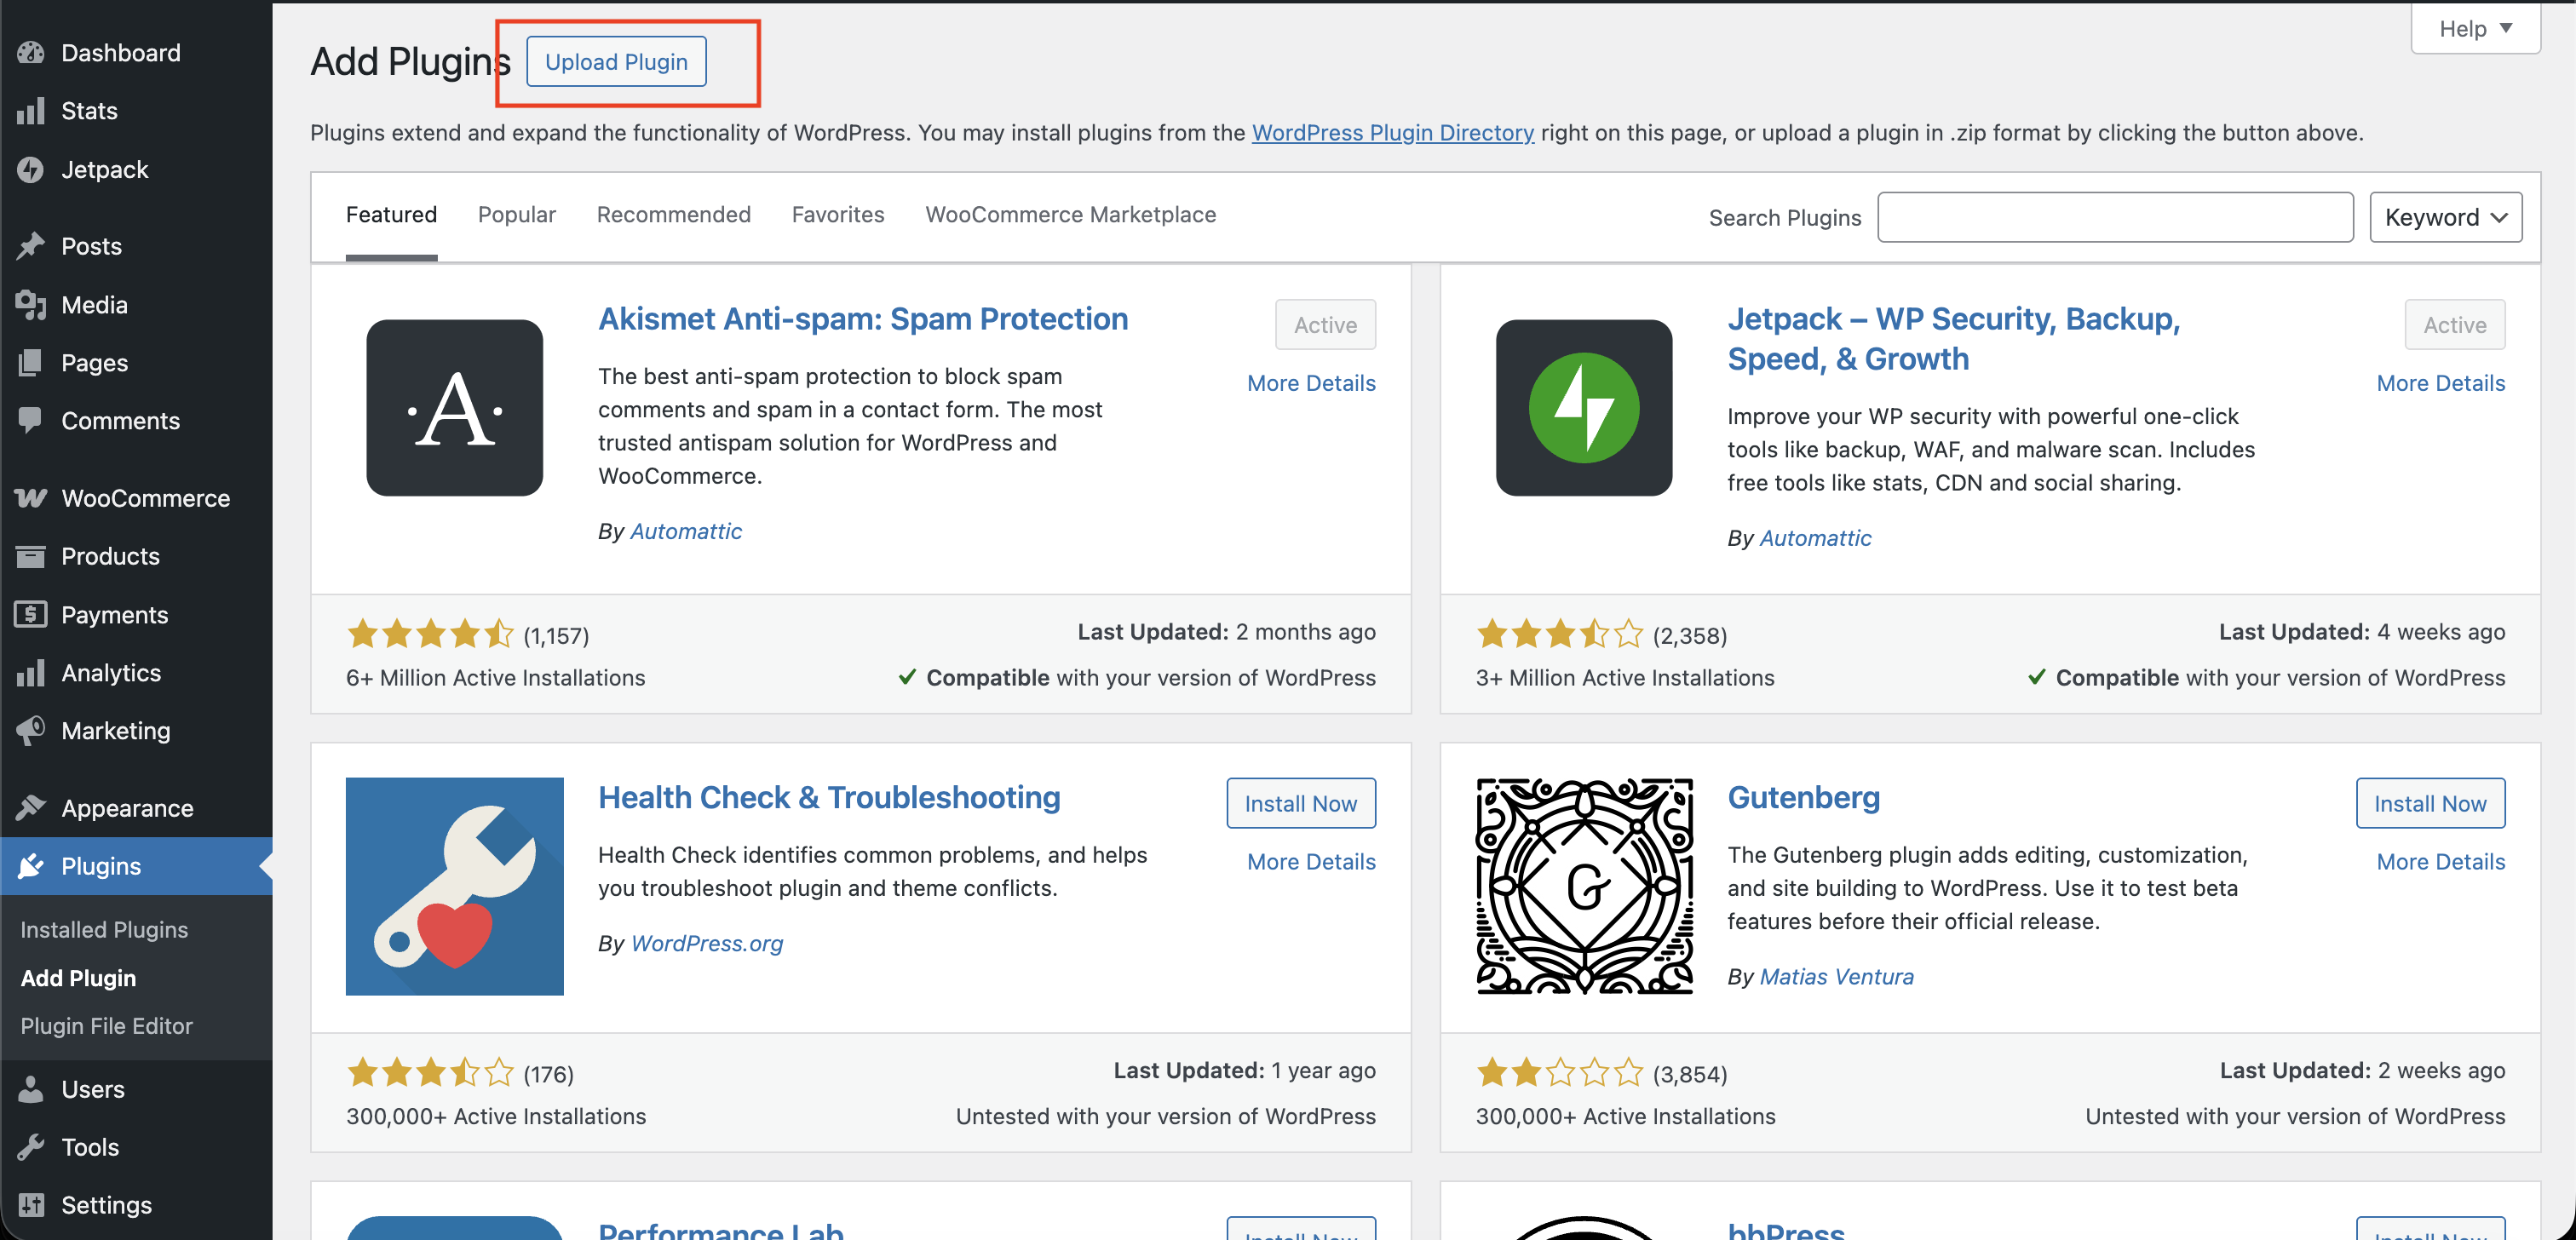
- From the list of plugins, click Upload Plugin.
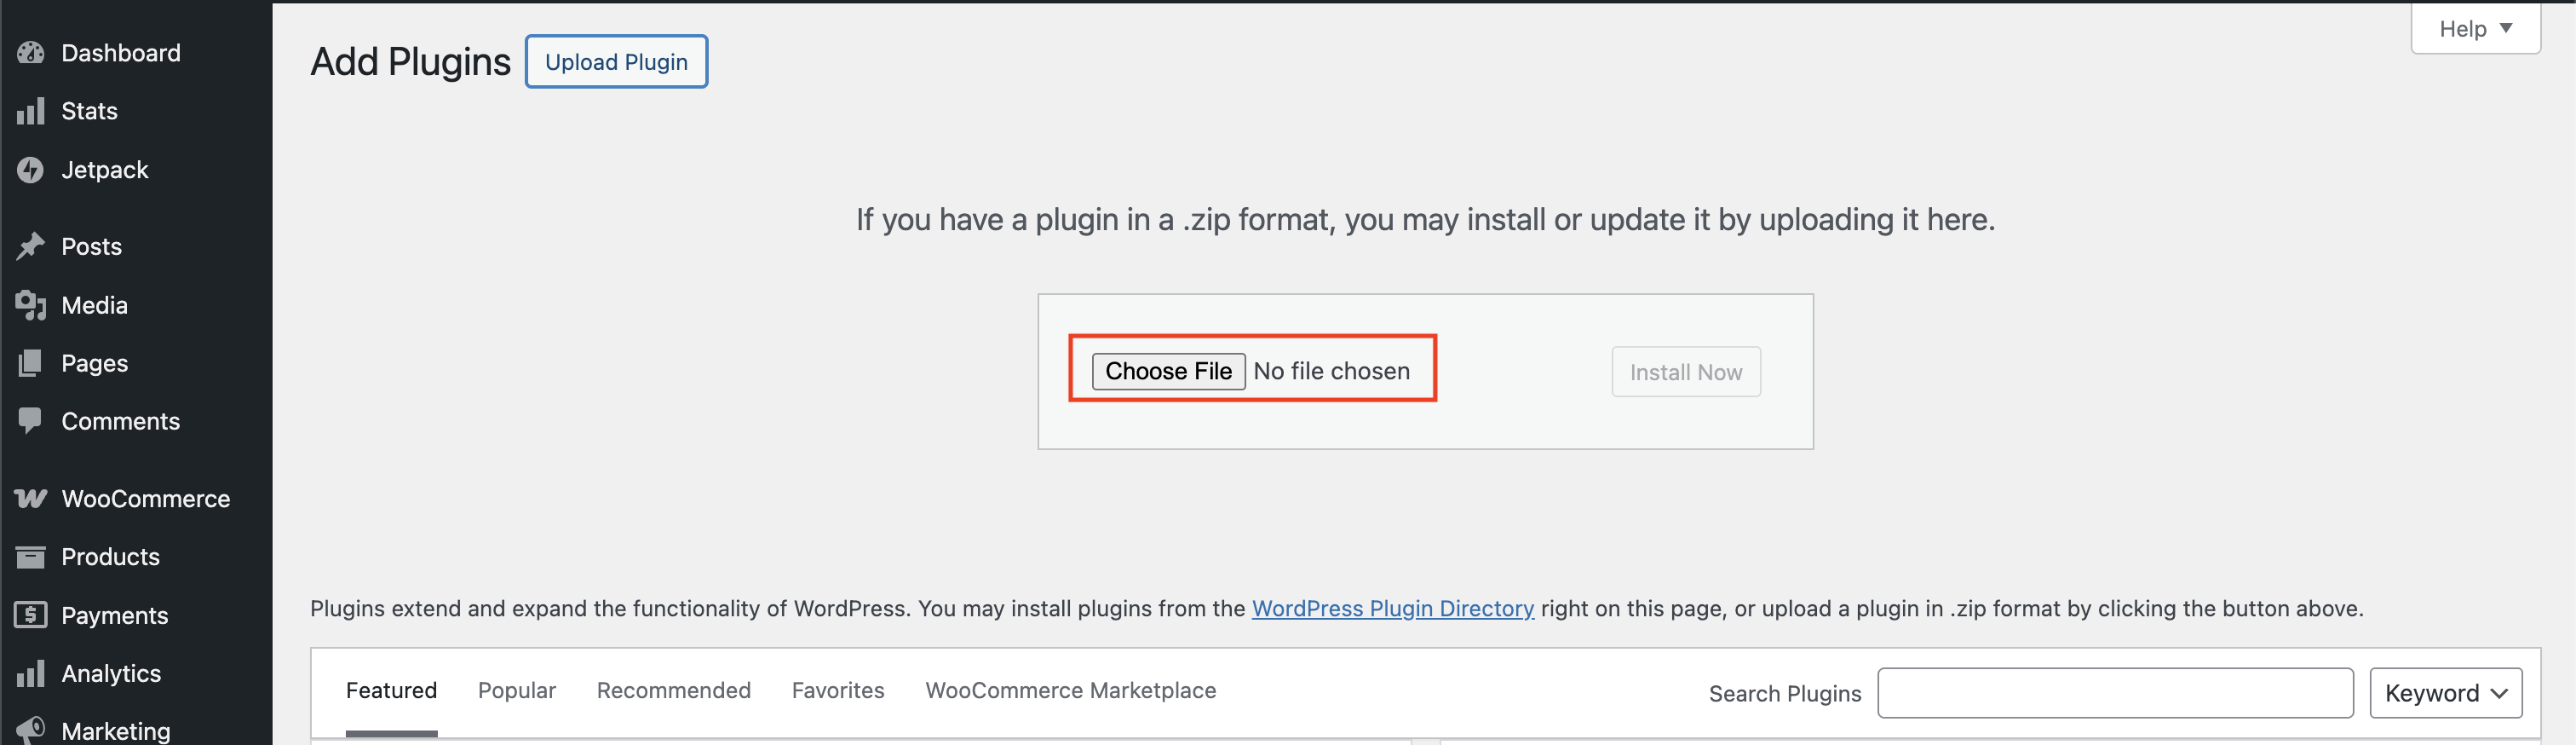
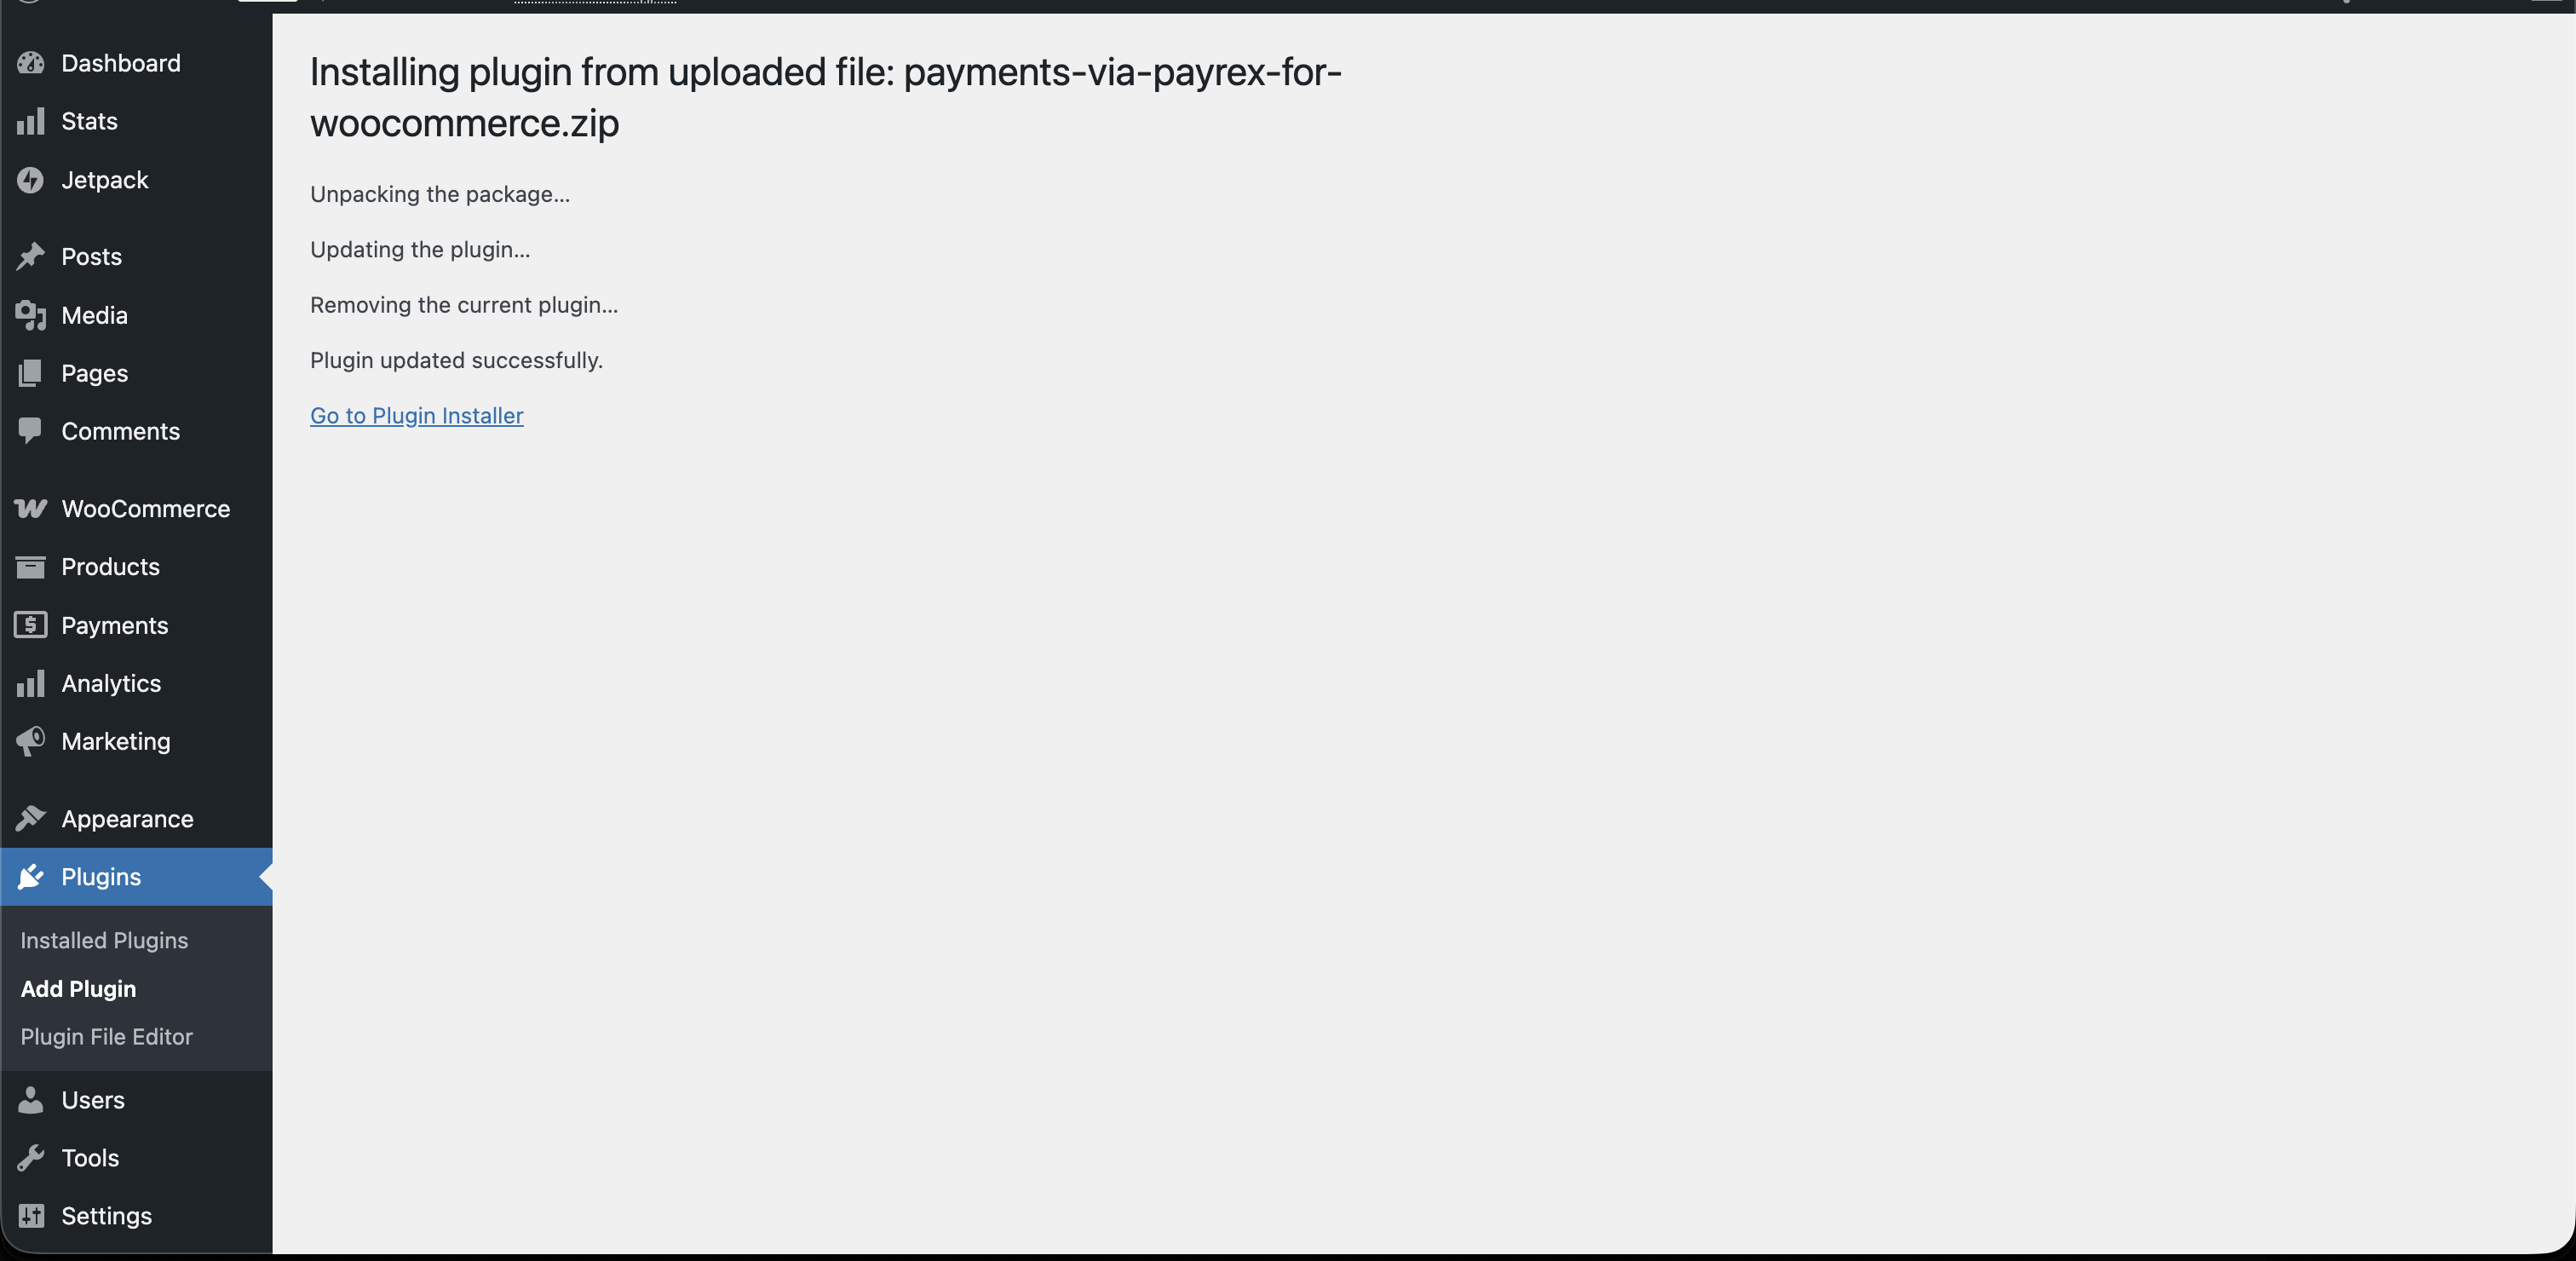
- Upload the zip file then after sucessfully uploading the plugin, start configuring it.
Configure the WooCommerce Plugin
Proceed from this section once you have successfully installed the plugin.
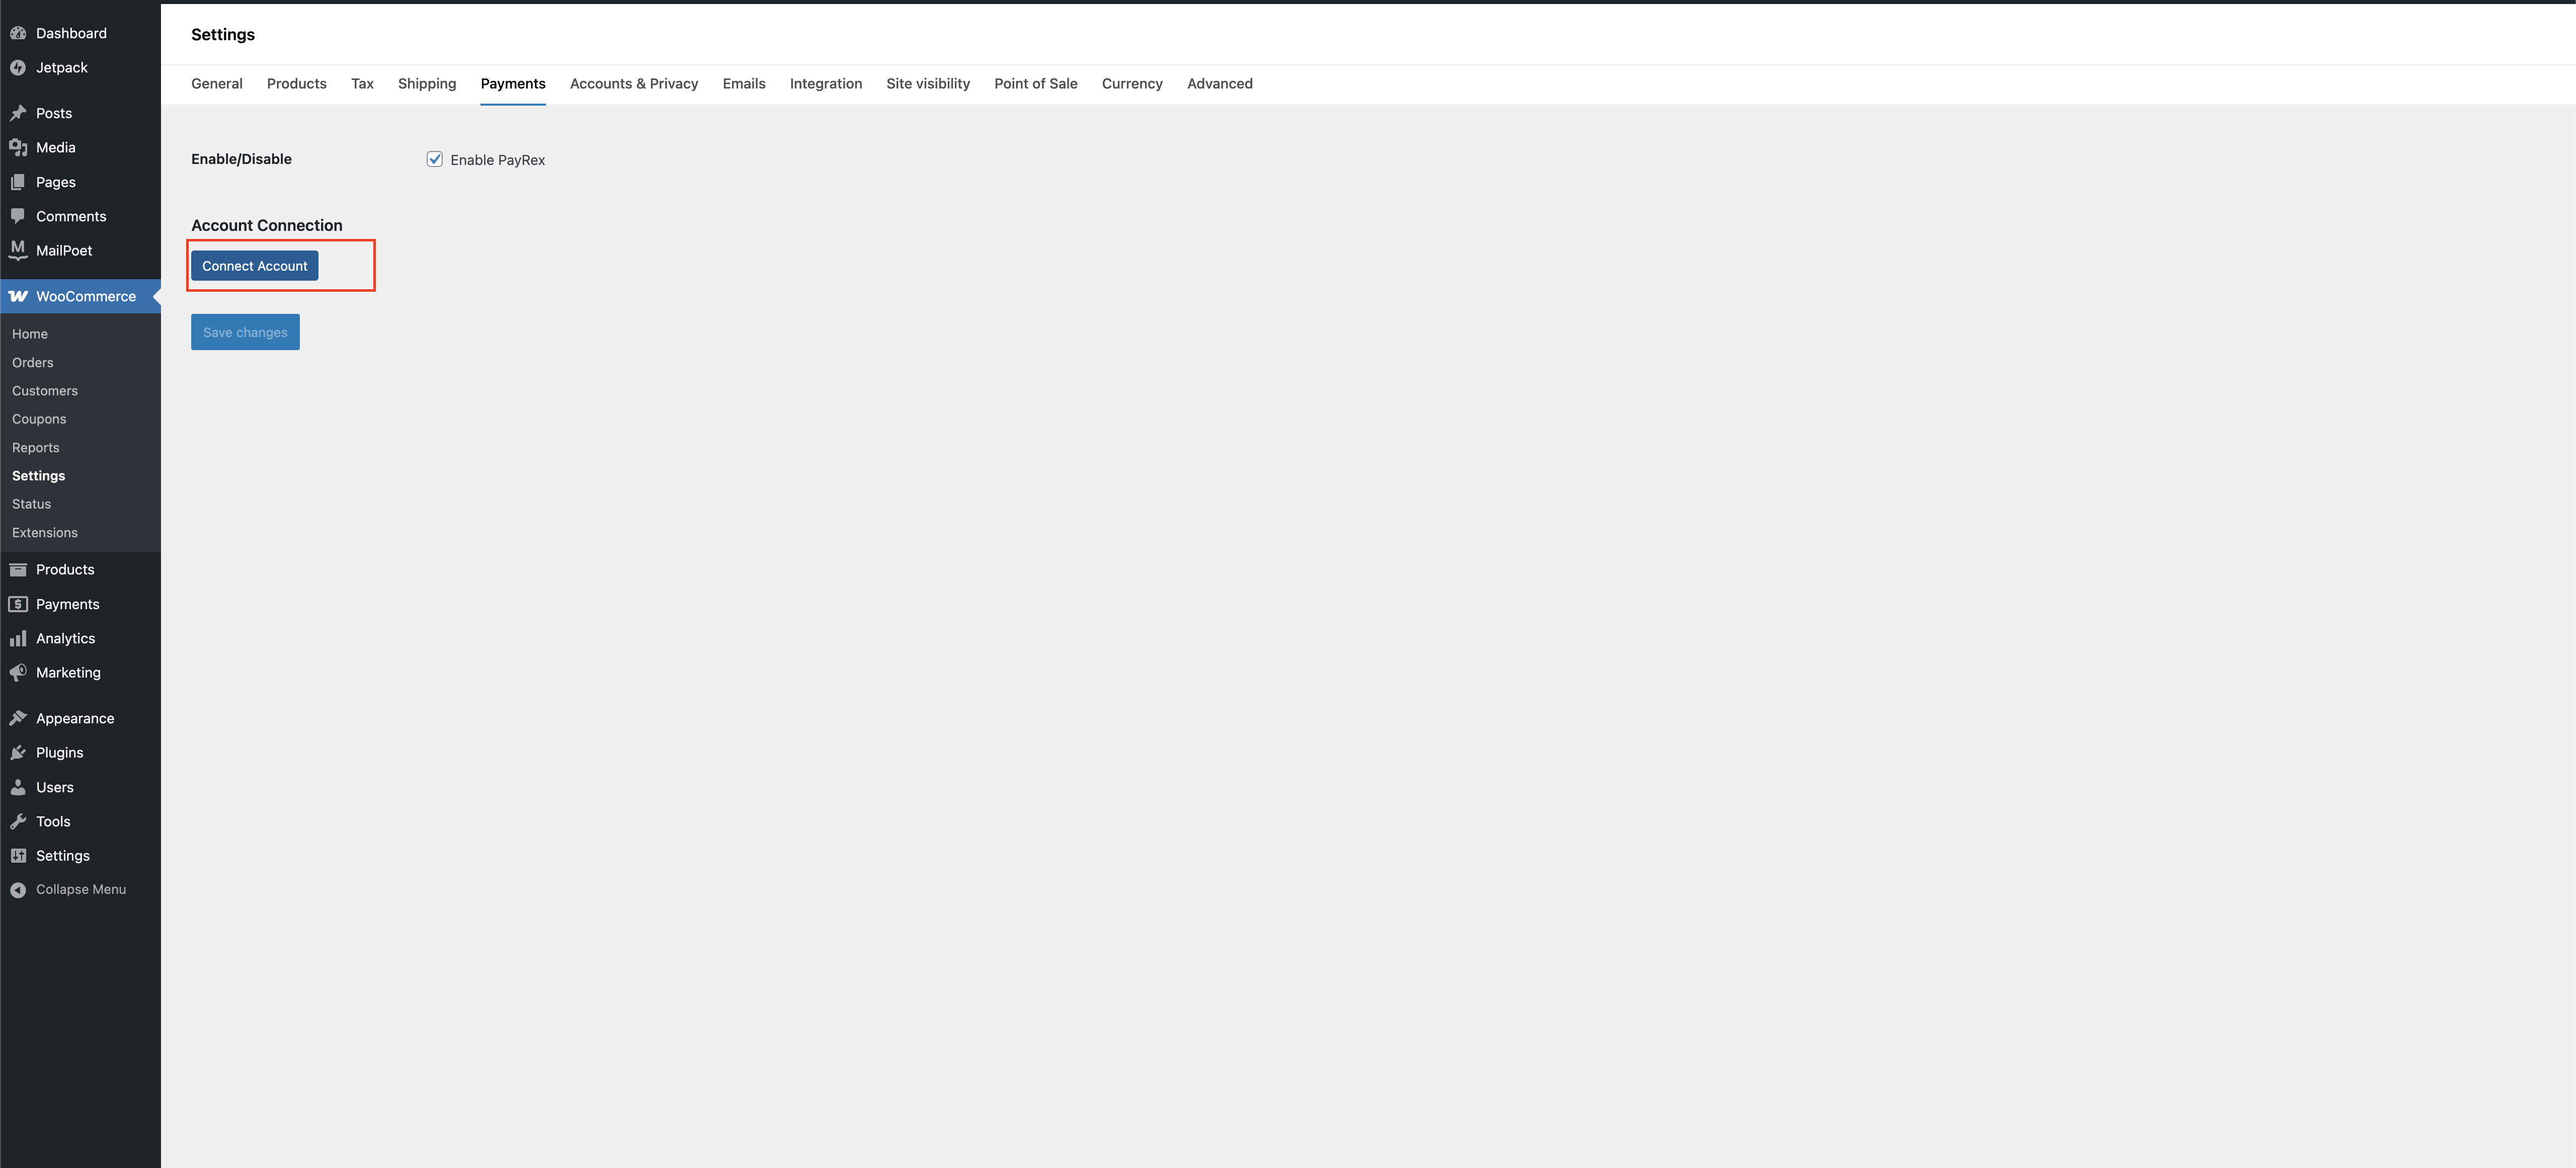
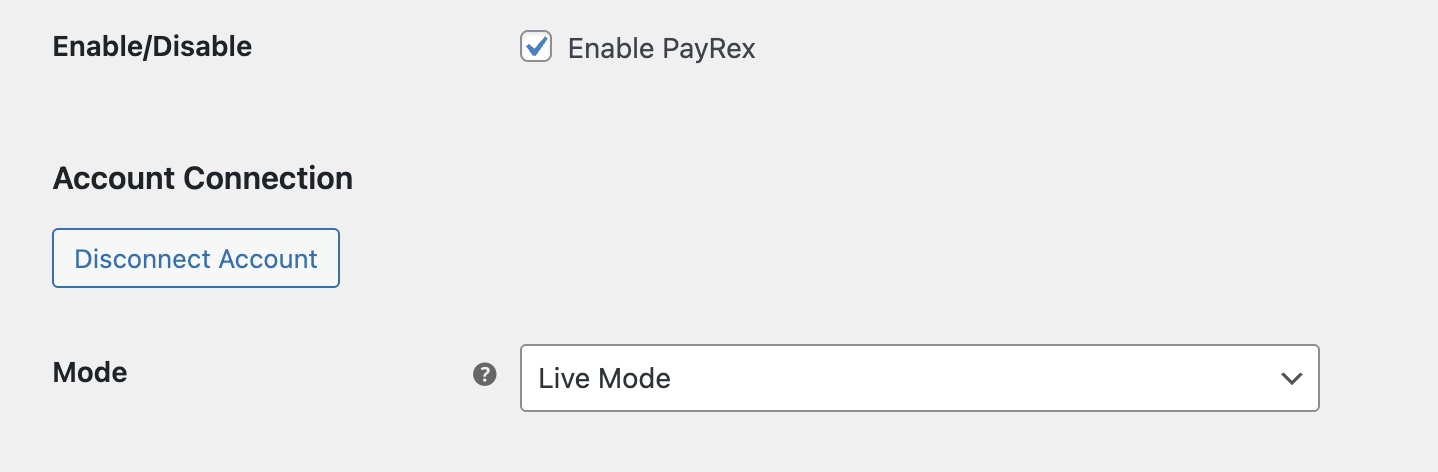
- Once the plugin is installed, you must connect your PayRex merchant account. To start connecting your account, go to the plugin's Payment Settings and click Connect Account.
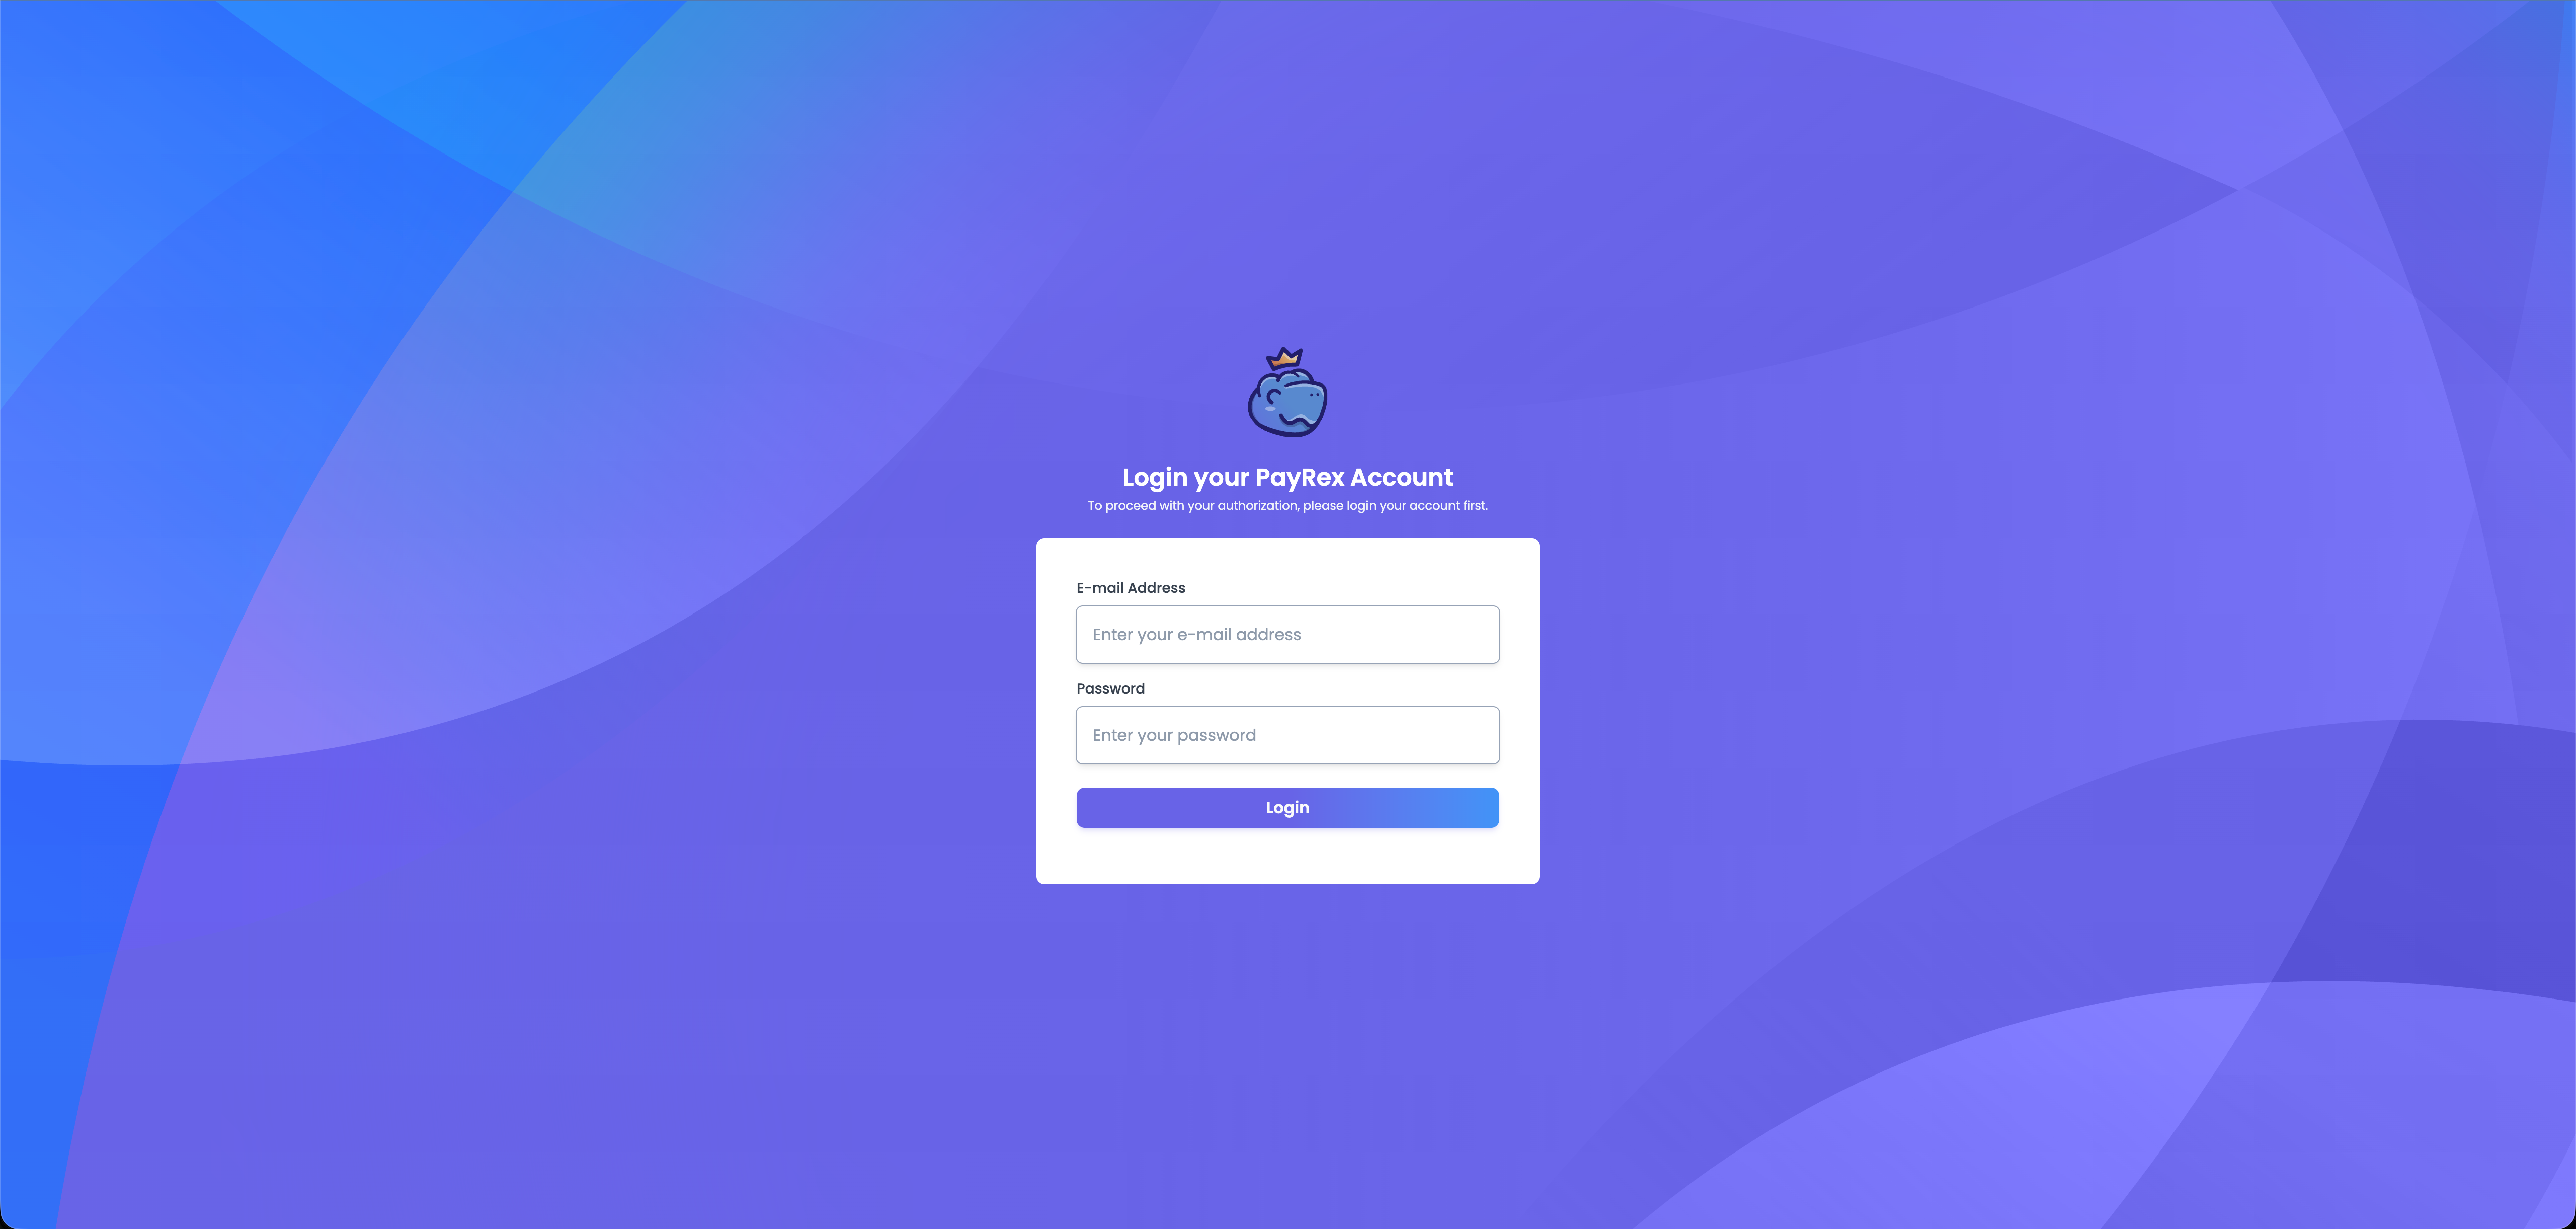
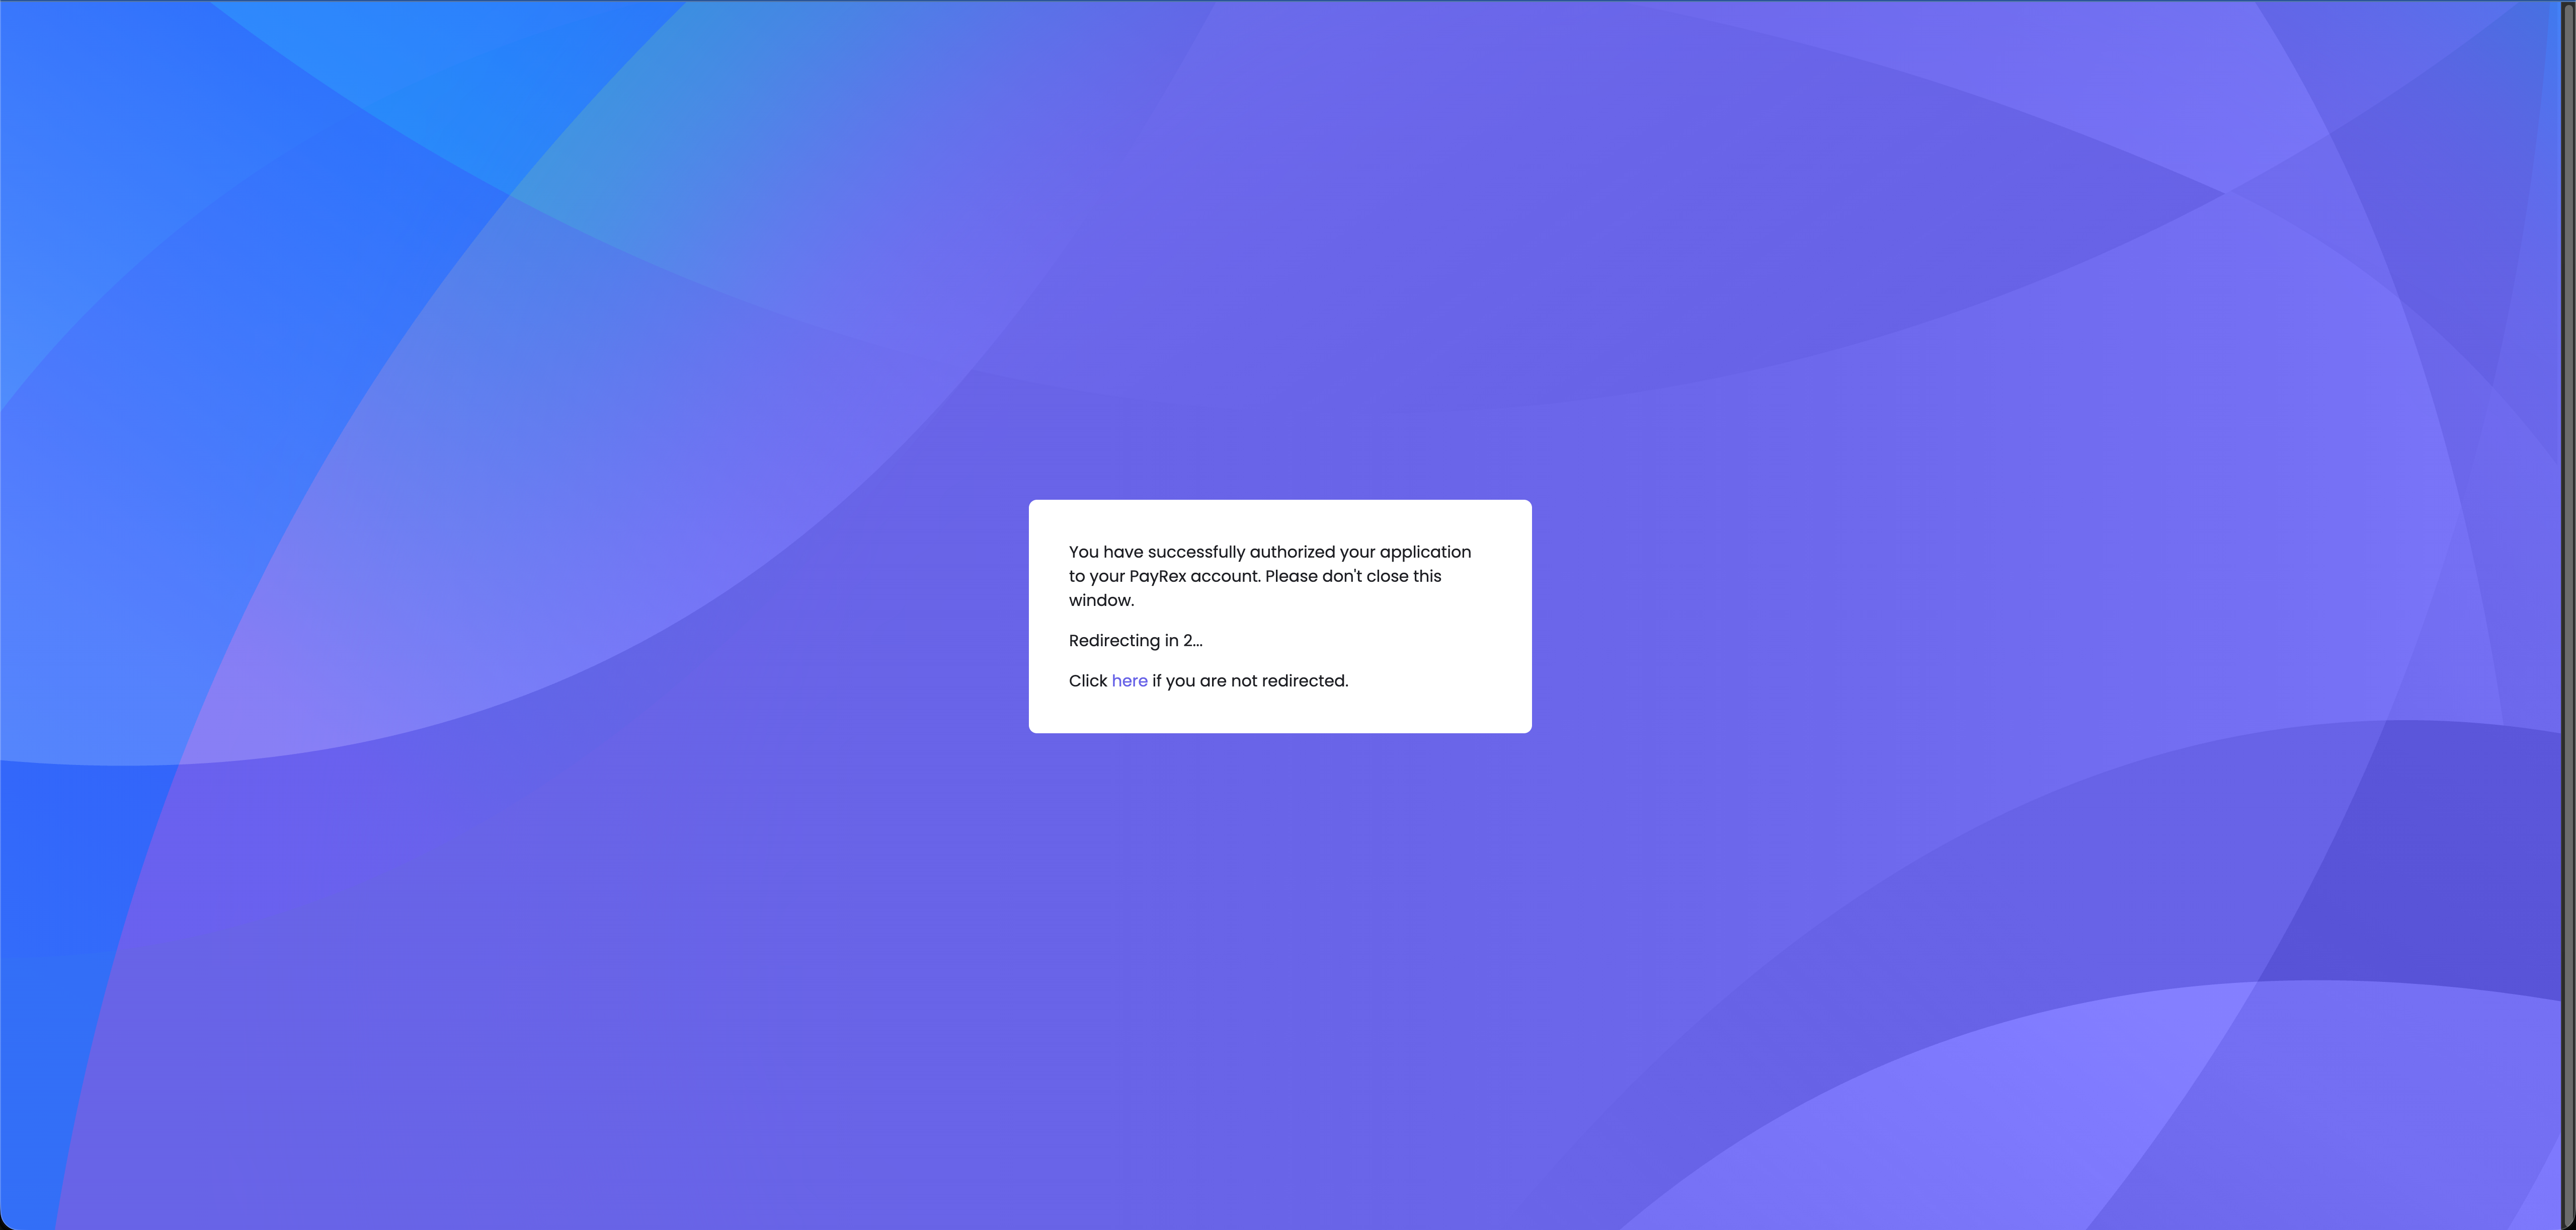
- Once you clicked Connect Account, you will be redirected to a PayRex login page. Login your PayRex user account to select the merchant account you want to connect.
- After logging in, select the merchant account you want to link.
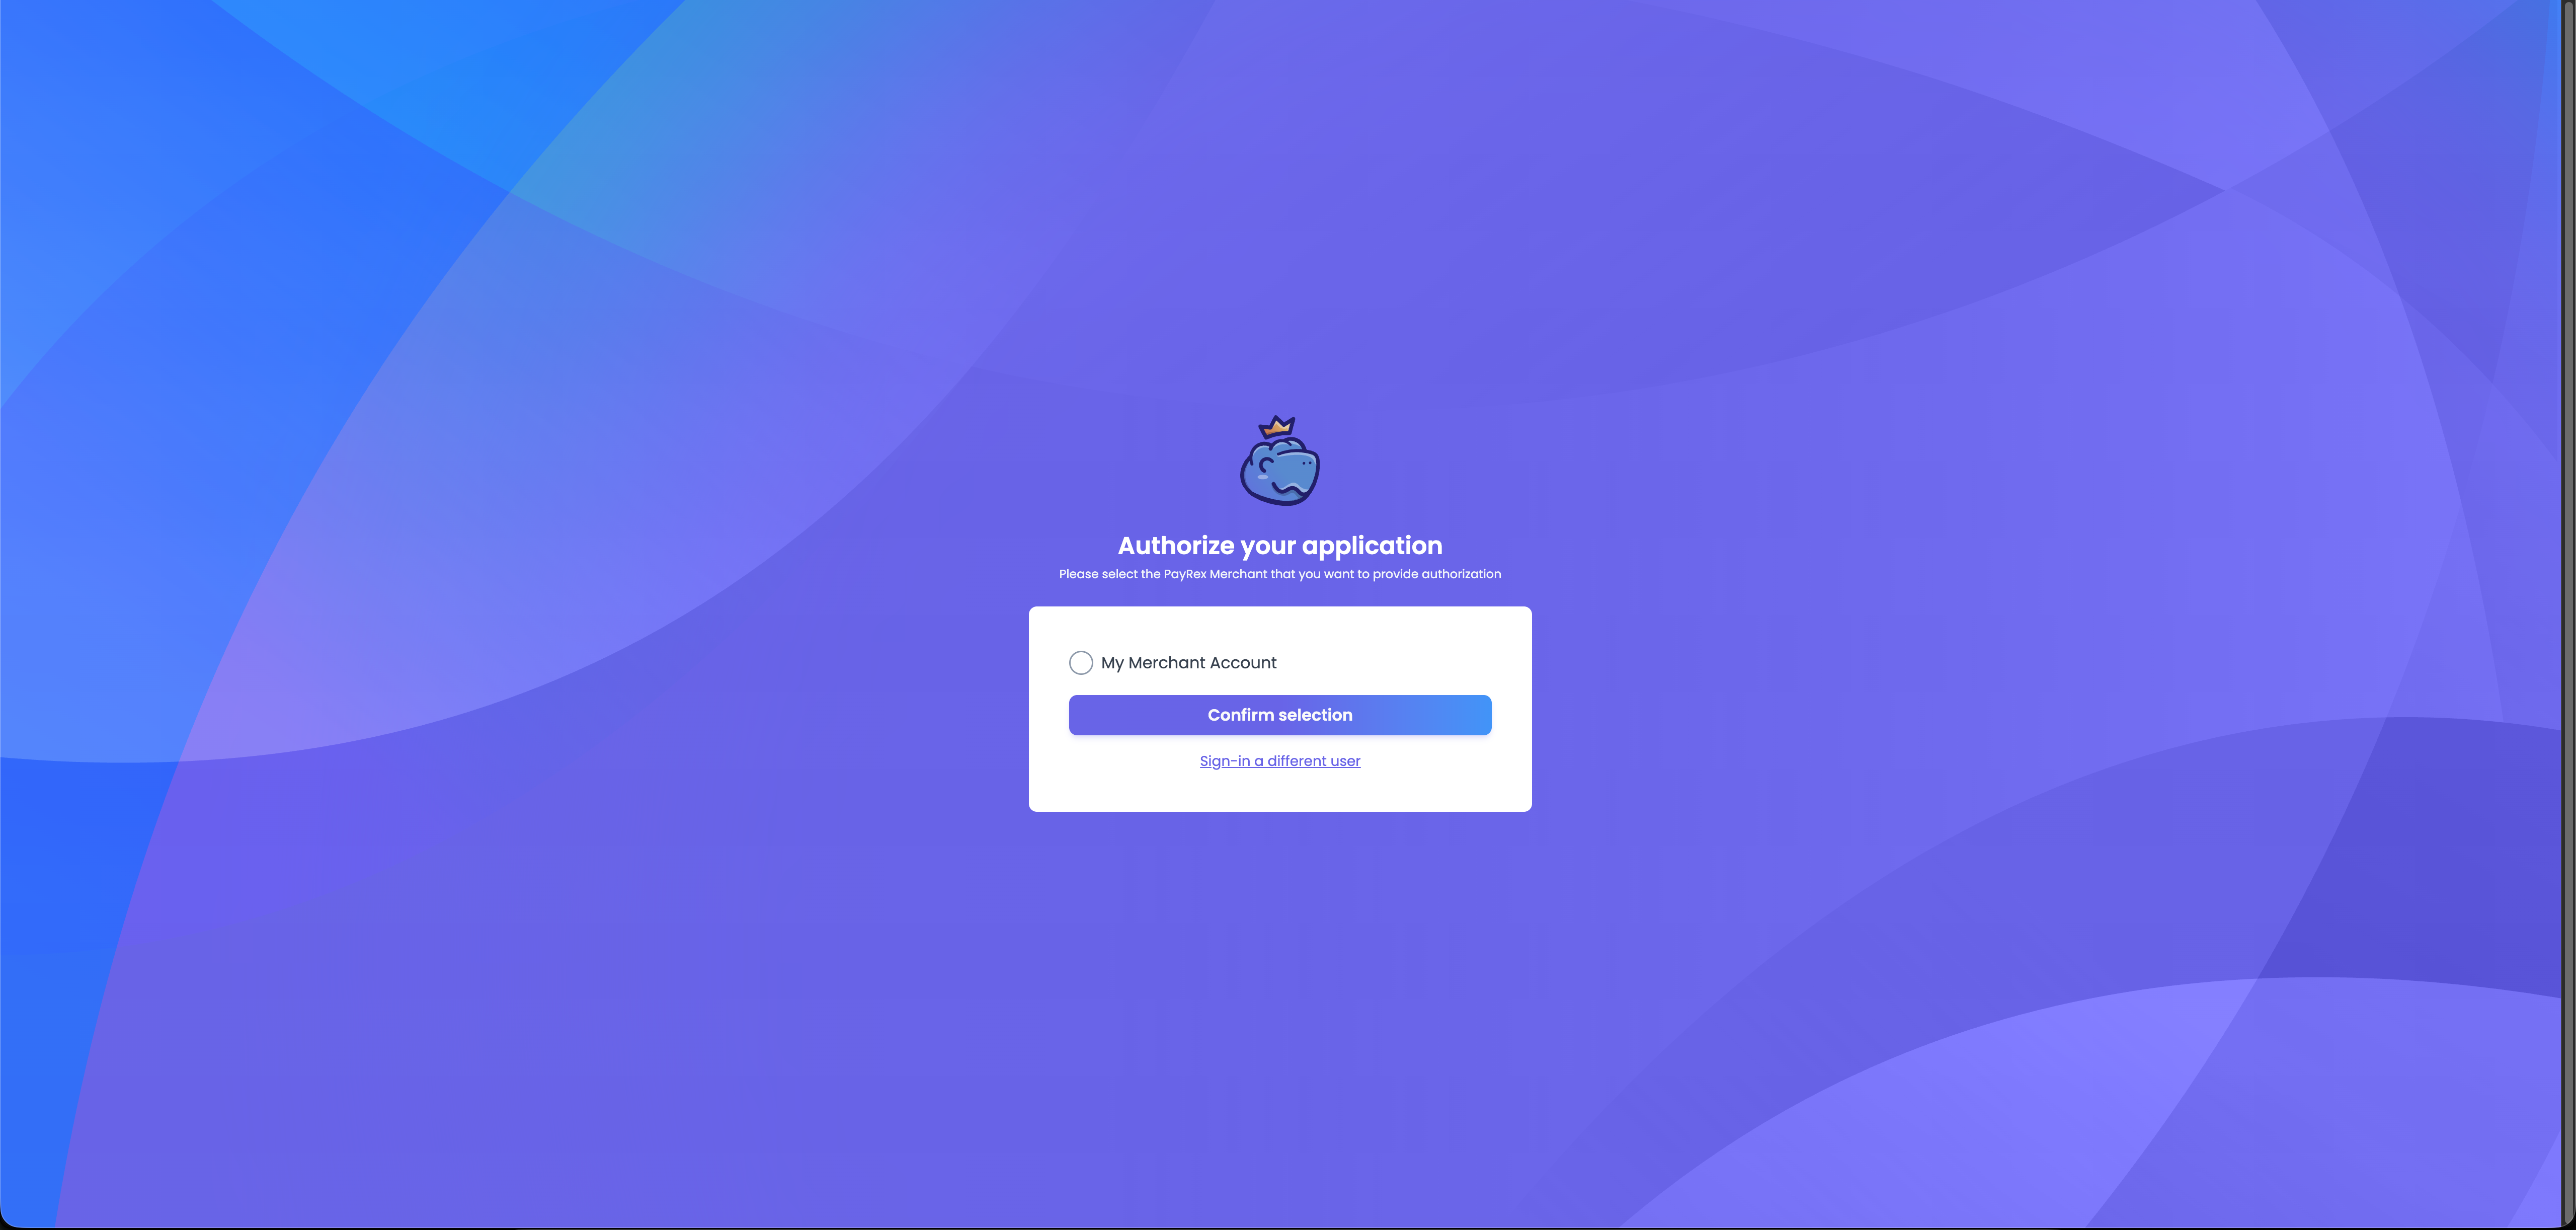
- Linking your PayRex merchant account automatically pulls the relevant configuration settings for your merchant account in the PayRex WooCommerce plugin. You will be redirected back to your store once you have successfully selected the merchant account.
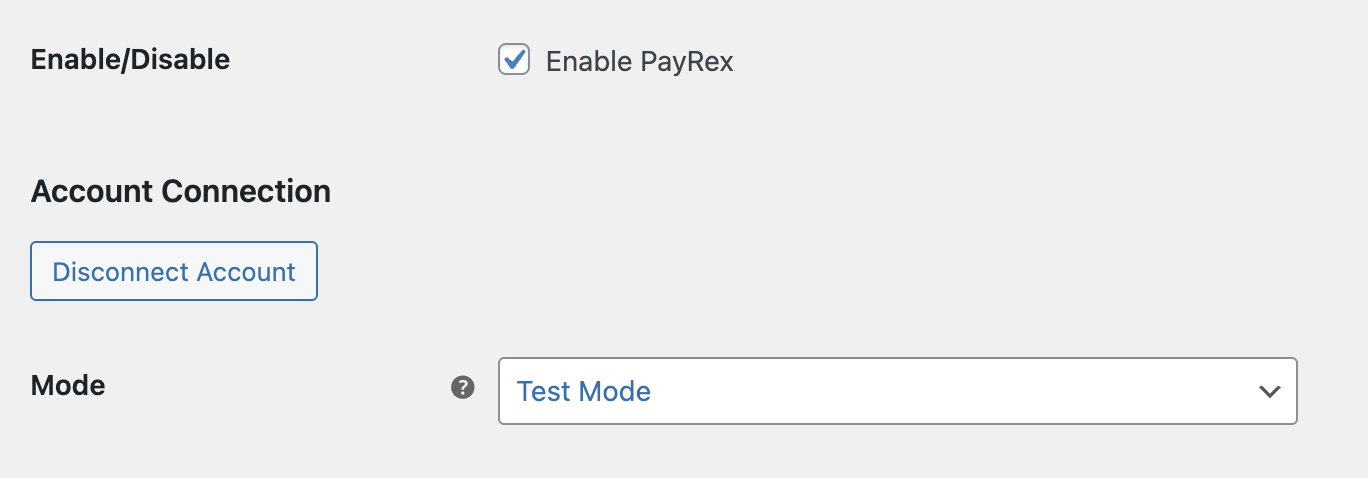
- Configure further your plugin settings once you are redirected back to your WooCommerce store. You can toggle between test and live mode.
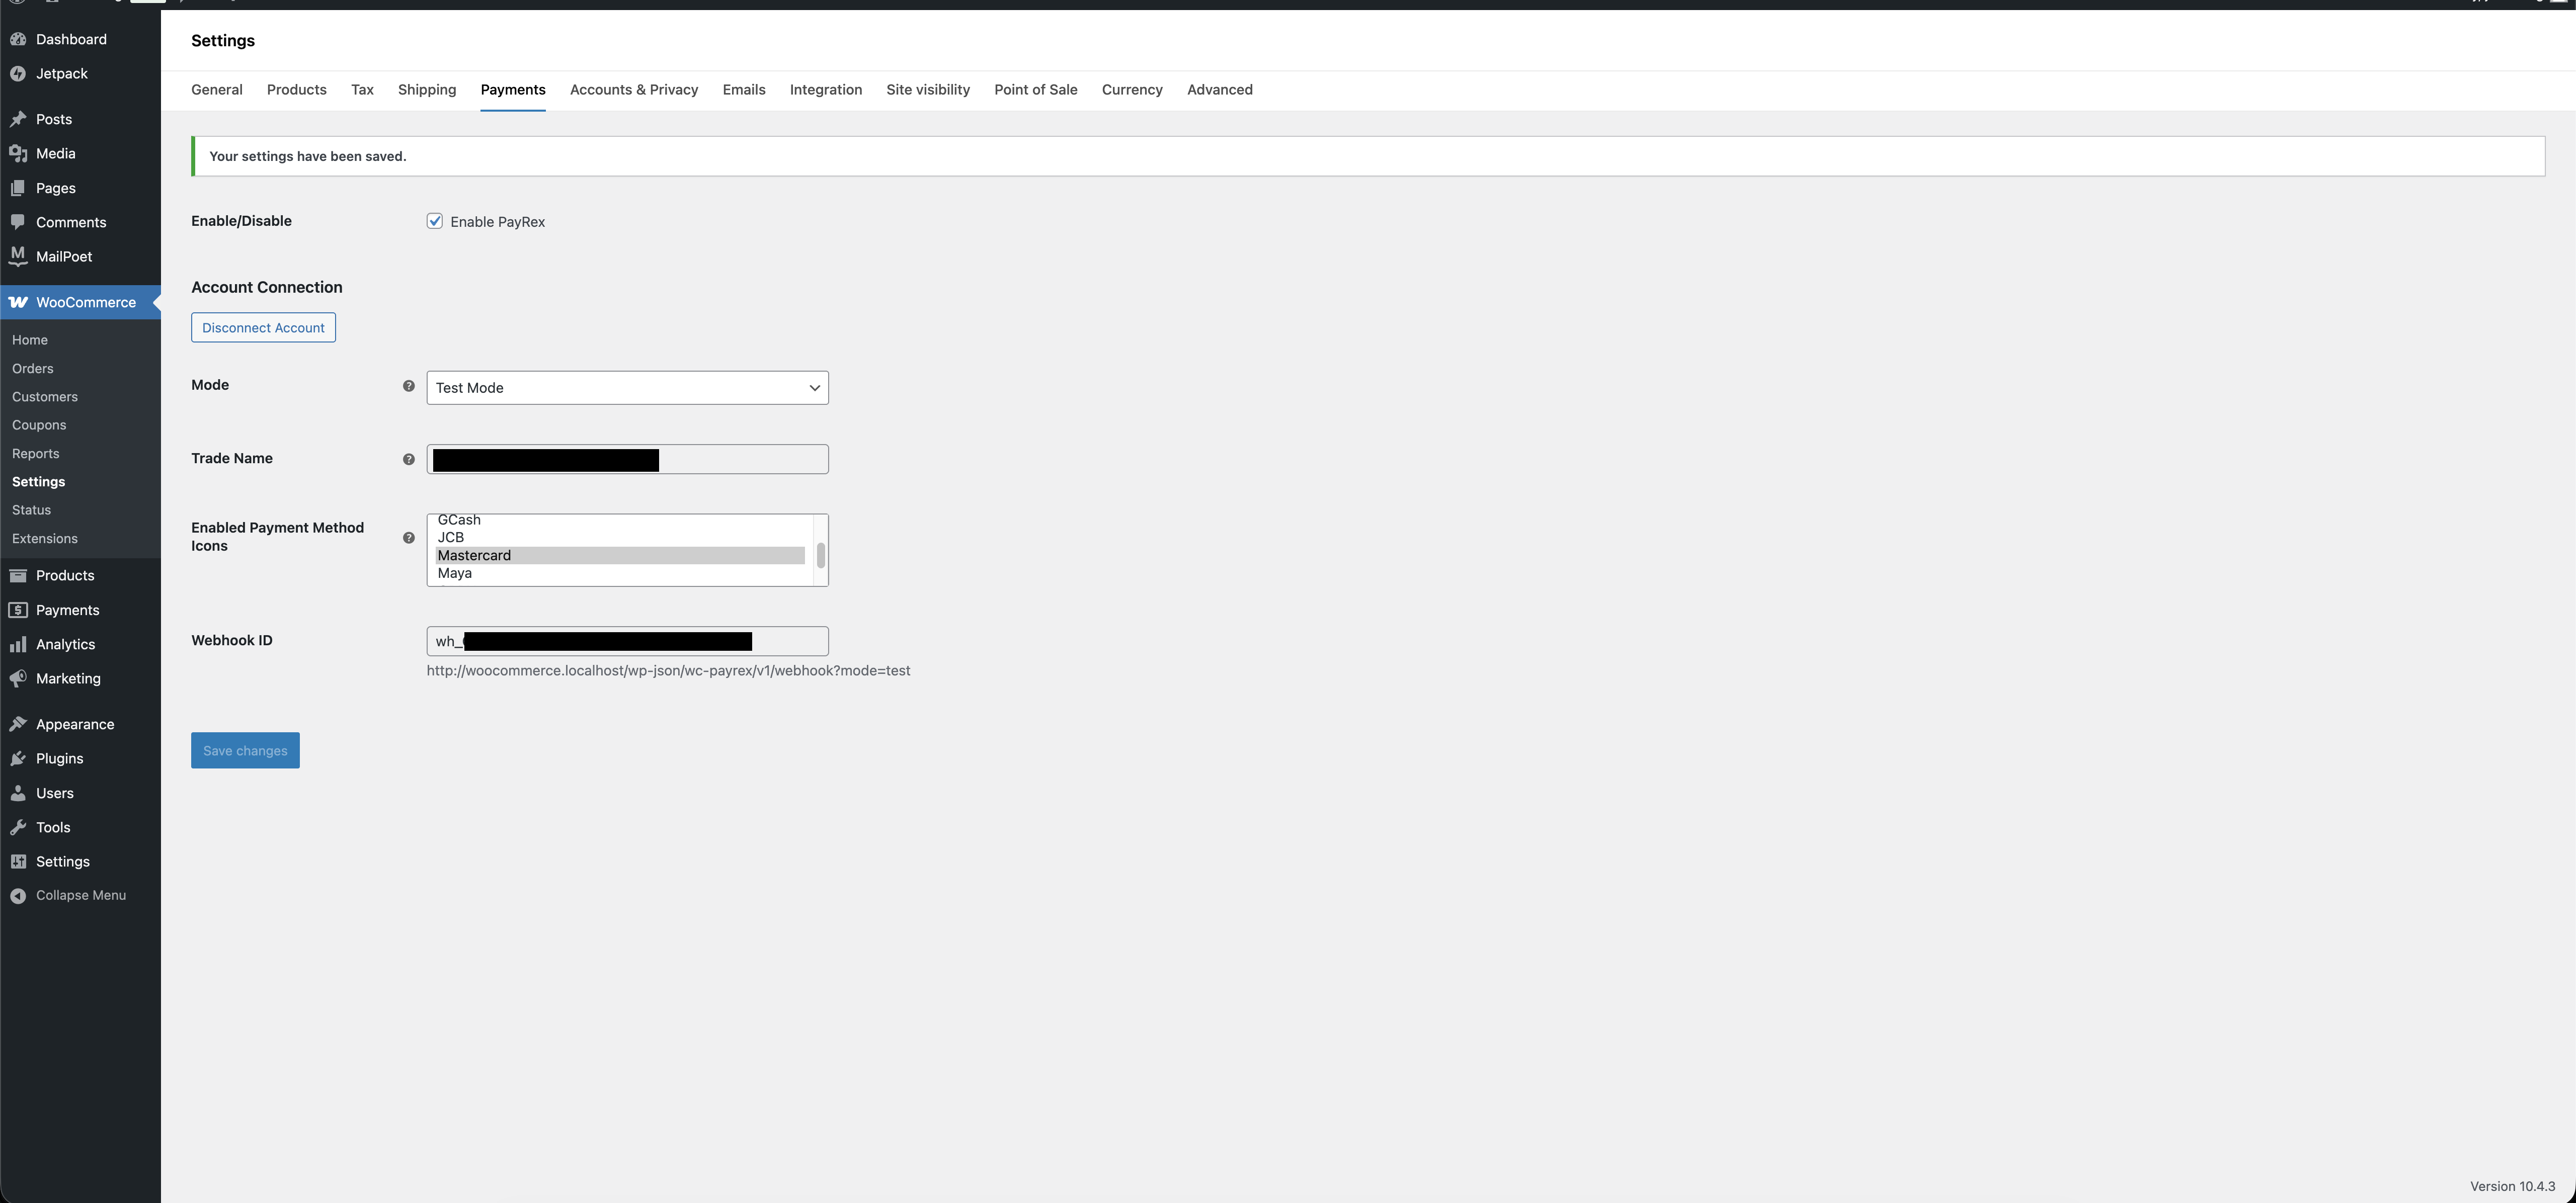
Mode - This describes whether the installed plugin is in test or live mode. Test mode simulates test payments. This means your store can complete payments using test transactions. Switching to live mode means you are ready to go live, and you can accept real money from your customers.
Trade Name - This is the trade name of your PayRex merchant account. This is the trade name of currently the linked PayRex merchant account.
Enabled Payment Methods - This shows the payment methods your store supports. This does not configure what your customers can choose to pay. To manage what your customers can choose to pay, please to this section
Webhook ID - PayRex automatically updates your WooCommerce orders once your customer successfully paid the order. Under the hood, we automatically created a PayRex webhook for you. You can view these webhooks from your PayRex Dashboard. It is best not to modify the webhook to avoid issues with your integration.
Ensure that the webhook URL is publicly accessible. If the webhook URL is not publicly accessible, PayRex cannot automatically update your orders.
Configuring the allowed payment methods
The payment methods allowed for your WooCommerce store can be configured in your PayRex Dashboard. To learn more about the allowed payment methods, you can refer to this guide.
Test payments through test mode
Do not switch to test mode if your WooCommerce store already has transacting customers. Once the plugin is installed and enabled, your customers will see PayRex at checkout, so you must turn off test mode from the plugin payment settings.
If your WooCommerce store is still not live, we highly recommend completing a test payment to see the end-to-end payment processing flow. If you already have a live WooCommerce store and want to process live payments, proceed to Step 4.
- To start with your test order, enable the Test Mode in the plugin's payment settings.
- Place a test order on your WooCommerce store. If you want to test a card payment, please refer to our list of test cards.
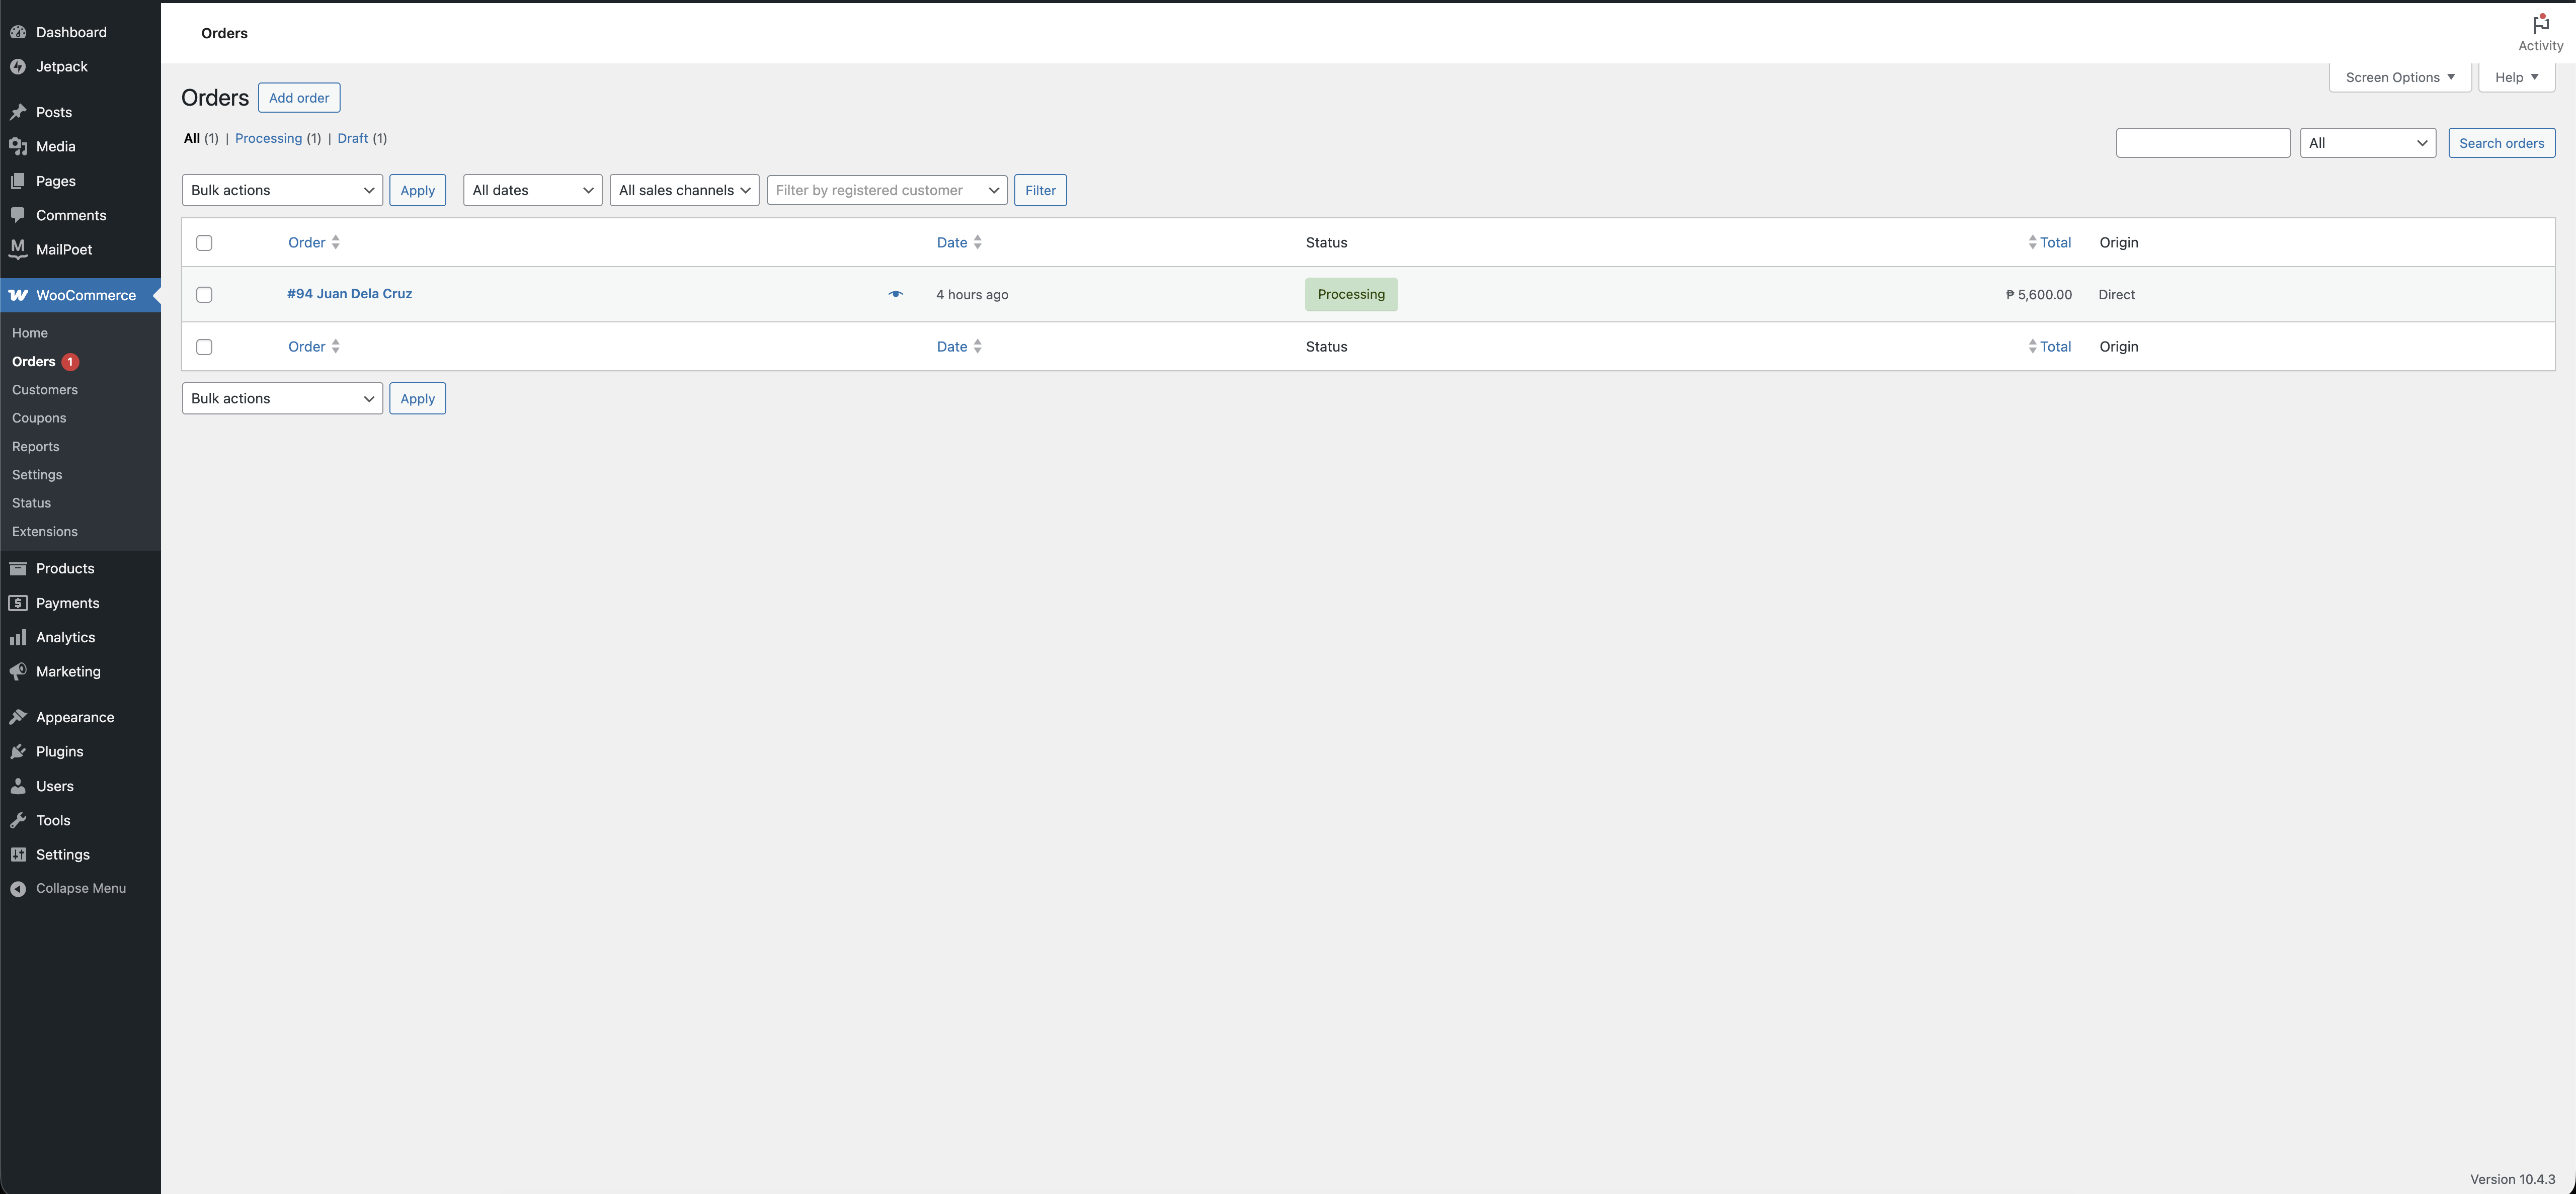
- After completing the test transaction, verify that the paid order appears in the WooCommerce Orders Module.
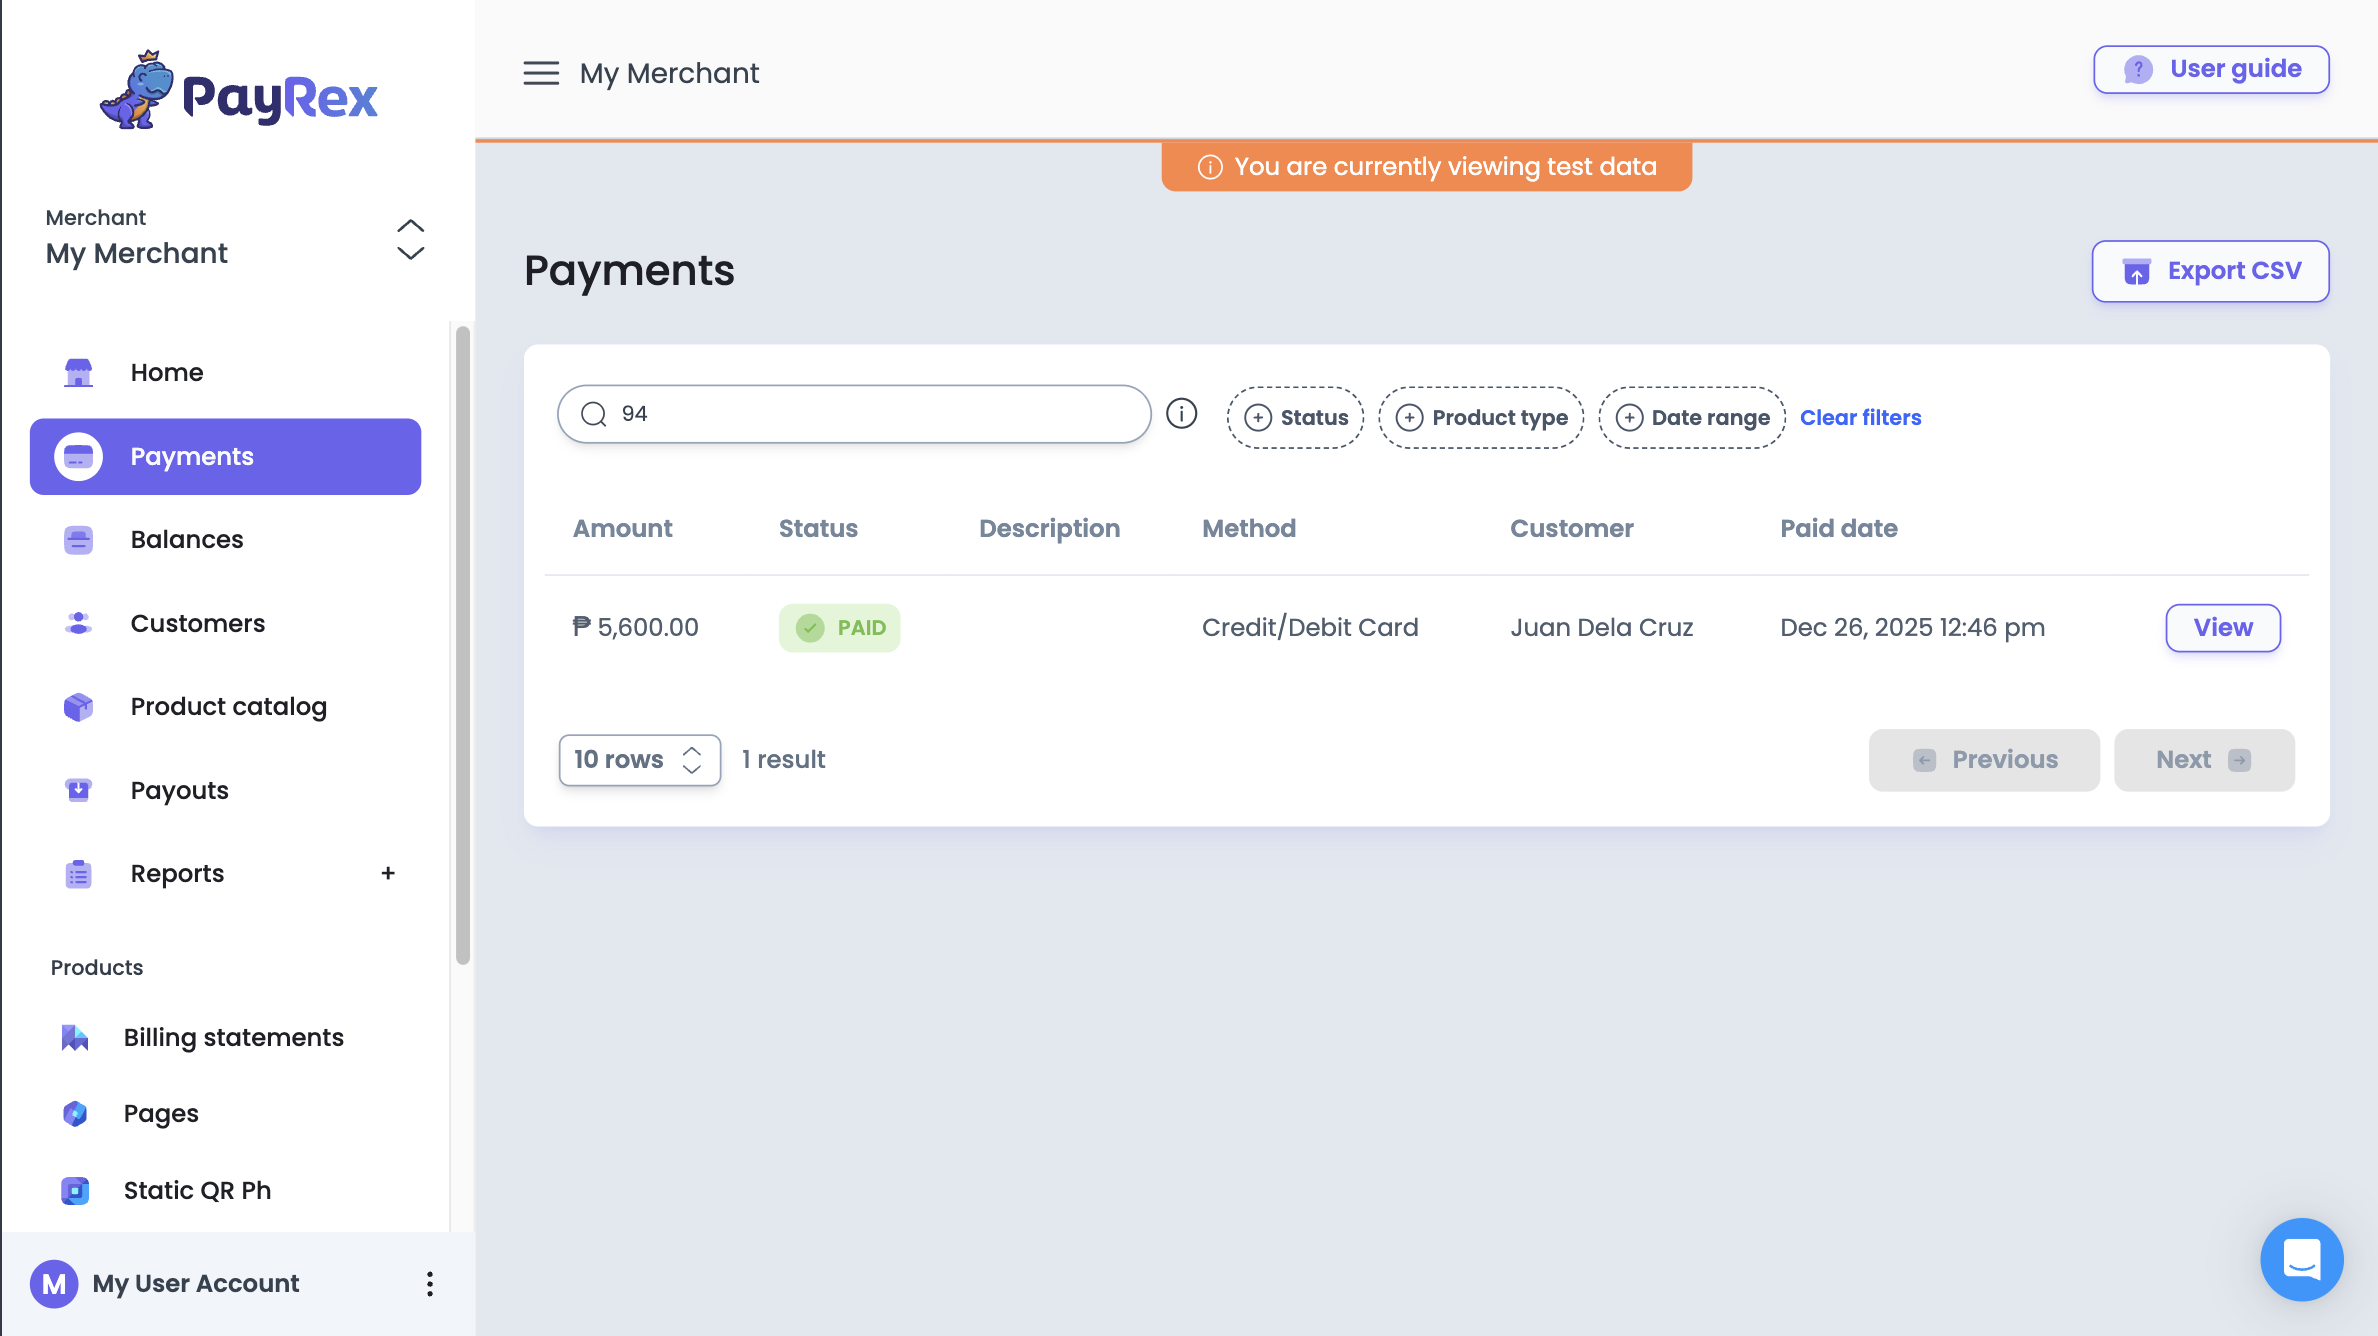
- Check if a test paid payment is also created within the PayRex dashboard, proceed to the Payments module of PayRex Dashboard and look for the test payment from the list. Ensure that the test mode toggle is turned on.
The WooCommerce Order ID should match the ID from PayRex's payment metadata. You can also search the listing by WooCommerce Order ID.
- If you have successfully completed the steps above, you can now proceed to go** **live by disabling the Test Mode from the payment settings.
Go Live
- Go to the plugins payment settings and check if the mode is set to Live mode.
- Perform a live transaction to confirm successful processing. You must use an actual payment method to complete a live transaction.
- After completing the live transaction, verify that the paid order appears in the WooCommerce Orders module.
- Check if the live paid payment is also created within the PayRex dashboard, head over to the Payments module of PayRex Dashboard and look for the live payment from the payment listing. Ensure that the test mode toggle is turned off.
Support
For further assistance, contact PayRex support through our chat feature or email us at support@payrexhq.com.