Webhooks
Learn how to use webhooks to listen for real-time events on your PayRex account and trigger your business logic around the updates.
Why should you use a webhook
When integrating with PayRex, you might want your backend system to react to specific events from your PayRex account. Through webhooks, your backend system can run business logic whenever PayRex sends updates to your webhook.
To listen to webhook events, you need to create a Webhook resource. After creating a Webhook resource, PayRex will send the event data to the URL of your Webhook resource when the listened events occur in your PayRex account. The event data is sent as a payload in JSON format and uses HTTPS to make a secure request.
Use cases for using a webhook:
- Execute asynchronous actions or business logic when events happen in your PayRex account, e.g., a successful payment is received, a chargeback has been created, a refund is partially refunded, etc.
- Ensure your business logic occurs even if your customer encounters internet connection problems. For example, for URL redirections, move it to your webhook instead of adding your business logic once your customer is redirected to a successful or failed page.
- Automate exporting data from the PayRex dashboard by receiving events straight to your webhook. One good example is if you're building an ETL for your business, you can use a webhook to receive real-time events in JSON form, transform the data if needed, and send it to your data warehouse.
What is an Event resource
The requests sent to your webhook have a JSON payload containing information about the event that occurred in your PayRex account.
When an event occurs in your PayRex account, PayRex creates an Event resource. A single API request in your PayRex account might create multiple events. For example, if you receive a successful payment, payment_intent.succeeded and payment.paid events are created, and it's up to you to subscribe to both events. The difference between these two events is that the payment_intent.succeeded subject is a PaymentIntent. At the same time, the payment.paid subject is a Payment resource.
Creating webhooks in your PayRex account allows PayRex to automatically send Event resources through POST HTTP requests to the URL you indicated in your Webhook resource. You can run backend business logic once your system receives the Event resource. For example, you can transform and send the event data to your data warehouse. Another example is calling your logistics provider's API to request a shipment after receiving a payment_intent.succeeded event.
The Event resource we sent to your webhook contains a snapshot of the changed resource. For example, in a payment_intent.succeeded event, the Event resource contains the Payment Intent data that transitions to succeeded status.
Sample Event resource
{
  "id": "evt_bxuGtXXC3zNsWbW3W1zQKiLWf67ZC4sa",
  "resource": "event",
  "type": "payment_intent.succeeded",
  "livemode": false,
  "pending_webhooks": 1,
  "data":{
    "resource": {
      "id": "pi_SJuGtXXC3XNRWpW3W1zQKiLWf67ZC4sX",
      "resource": "payment_intent",
      "amount": 10000,
      "payment_methods": ["card", "gcash"],
      "status": "awaiting_payment_method",
      "capture_type": "automatic",
      "client_secret": "pi_SJuGtXXC3XNRWpW3W1zQKiLWf67ZC4sX_secret_7KGizzHuLtPtaLwiRMHekBHRUo6yv52r",
      "currency": "PHP",
      "description" :"",
      "livemode": false,
      "metadata": null,
      "next_action": {
        "type": "redirect",
        "redirect_url": "https://my-application/redirect"
      },
      "created_at": 1700407880,
      "updated_at": 1700407880
    },
    "previous_attributes": {
      "status": "awaiting_next_action"
    }
  },
  "created_at": 1680064018,
  "updated_at": 1680064015
}
How are events generated?
See the table below to understand how Event resources are created in your PayRex account.
| Event Source | Trigger |
|---|---|
| Dashboard | When actions in PayRex Dashboard trigger internal PayRex APIs. |
| API | When you call a PayRex API endpoint programmatically. |
Setting up a Webhook in your PayRex account
1. Identify the events that you want to monitor for your webhook URL
PayRex maintains a list of possible events you can monitor from your Account. Please see this list.
2. Prepare your API endpoint
Depending on your programming language and framework, set up an API endpoint that can accept webhook requests from PayRex via a POST method. If you're still developing on your local machine, you can use HTTP. However, it would help if you made the local API endpoint publicly accessible. You can use free public reverse proxy tools such as ngrok.
Some requirements when setting up an API endpoint:
- Responds to POST method requests with a JSON payload composed of an Event resource.
- Returns a successful HTTP code (2xx) within the server timeout. If your endpoint returns a non-2xx response, we will treat it as a failed send attempt and try again later.
Example endpoint
- Node
- PHP
- Python
- Ruby
// Protect your PayRex Secret API key at all costs. One common approach is
// storing it in an environment variable.
// Add your PayRex test secret API key.
const payrexSecretApiKey = '';

const payrex = require('payrex-node')(payrexSecretApiKey);

// Highly recommended to store this to an environment variable.
webhookSecretKey = 'whsk_...';

payload = '';
signatureHeader = 't=...,te=,li=...';

try {
  const event = await payrex.webhooks.parseEvent(payload, signatureHeader, webhookSecretKey);
} catch (error) {
  if (error.name === 'ValueUnexpectedError') {
    // Handle unexpected value
  } else {
    // Handle other possible errors
  }
}

// Handle the event
switch (event.type) {
  case 'payment_intent.succeeded':
    const paymentIntent = event.data;

    // Handle payment intent succeeded
    break;
  default:
    console.log(`Received unknown event type ${event.type}`);
    break;
}
require_once '../vendor/autoload.php';

// Protect your PayRex Secret API key at all costs. One common approach is
// storing it in an environment variable.
// Add your PayRex test secret API key.
$payrexSecretApiKey = '';
$payrex = new \Payrex\PayrexClient($payrexSecretApiKey);

$payload = @file_get_contents('php://input');
$event = null;

try {
    $event = \Payrex\Event::parse($payload);
} catch(\Payrex\Exceptions\UnexpectedValueException $e) {
    // Invalid payload
    http_response_code(400);
    exit();
}

// Handle the event
switch ($event->type) {
    case 'payment_intent.succeeded':
        $paymentIntent = $event->data->resource; // contains a \Payrex\PaymentIntent instance
        paymentIntentSucceededHandler($paymentIntent);
        break;
    default:
        echo 'Received unknown event type ' . $event->type;
}

http_response_code(200);
from payrex import Client as PayrexClient

# Protect your PayRex Secret API key at all costs. One common approach is
# storing it in an environment variable.
# Add your PayRex test secret API key.
payrex_secret_api_key = ''
payrex = PayrexClient(payrex_secret_api_key)

# Highly recommended to store this to an environment variable.
webhook_secret_key = 'whsk_...'

payload = ''
signature_header = 't=...,te=,li=...'

try:
    event = payrex.webhooks.parse_event(
        payload,
        signature_header,
        webhook_secret_key
    )
except ValueUnexpectedError as e:
    # Handle invalid payload

    http_response_code = 400
    # exit

# Handle the event
if event.type == 'payment_intent.succeeded':
    payment_intent = event.data

    # Handle payment intent succeeded
else:
    print(f'Received unknown event type {event.type}')

http_response_code = 200
require "payrex-ruby"

# Protect your PayRex Secret API key at all costs. One common approach is
# storing it in an environment variable.
# Add your PayRex test secret API key.
payrex_secret_api_key = ""
payrex = Payrex::Client.new(payrex_secret_api_key)

# Highly recommended to store this to an environment variable.
webhook_secret_key = "whsk_..."

payload = ""
signature_header = "t=...,te=,li=..."

begin
  event = payrex.webhook.parse_event(
    payload: payload,
    signature_header: signature_header,
    webhook_secret_key: webhook_secret_key
  )
rescue Payrex::Errors::ValueUnexpectedError => e
  # Handle invalid payload

  http_response_code = 400
  exit
end

# Handle the event
case event.type
when "payment_intent.succeeded"
  payment_intent = event.data

  # Handle payment intent succeeded
else
  puts "Received unknown event type #{event.type}"
end

http_response_code = 200
Retry behavior
PayRex attempts to deliver a given event to your webhook endpoint for up to 3 days with an exponential back off.
If your Webhook has been disabled or deleted while PayRex attempts to retry sending an event due to failed attempts, future retries of that event will not continue. However, suppose you disable and re-enable the Webhook before PayRex attempts to send the event. In that case, you will still receive the future events.
3. Create and manage your webhook in PayRex
After testing your webhook endpoint, register your endpoint URL via webhooks module. To create a webhook, go to Developers module from the dashboard, then click webhooks.
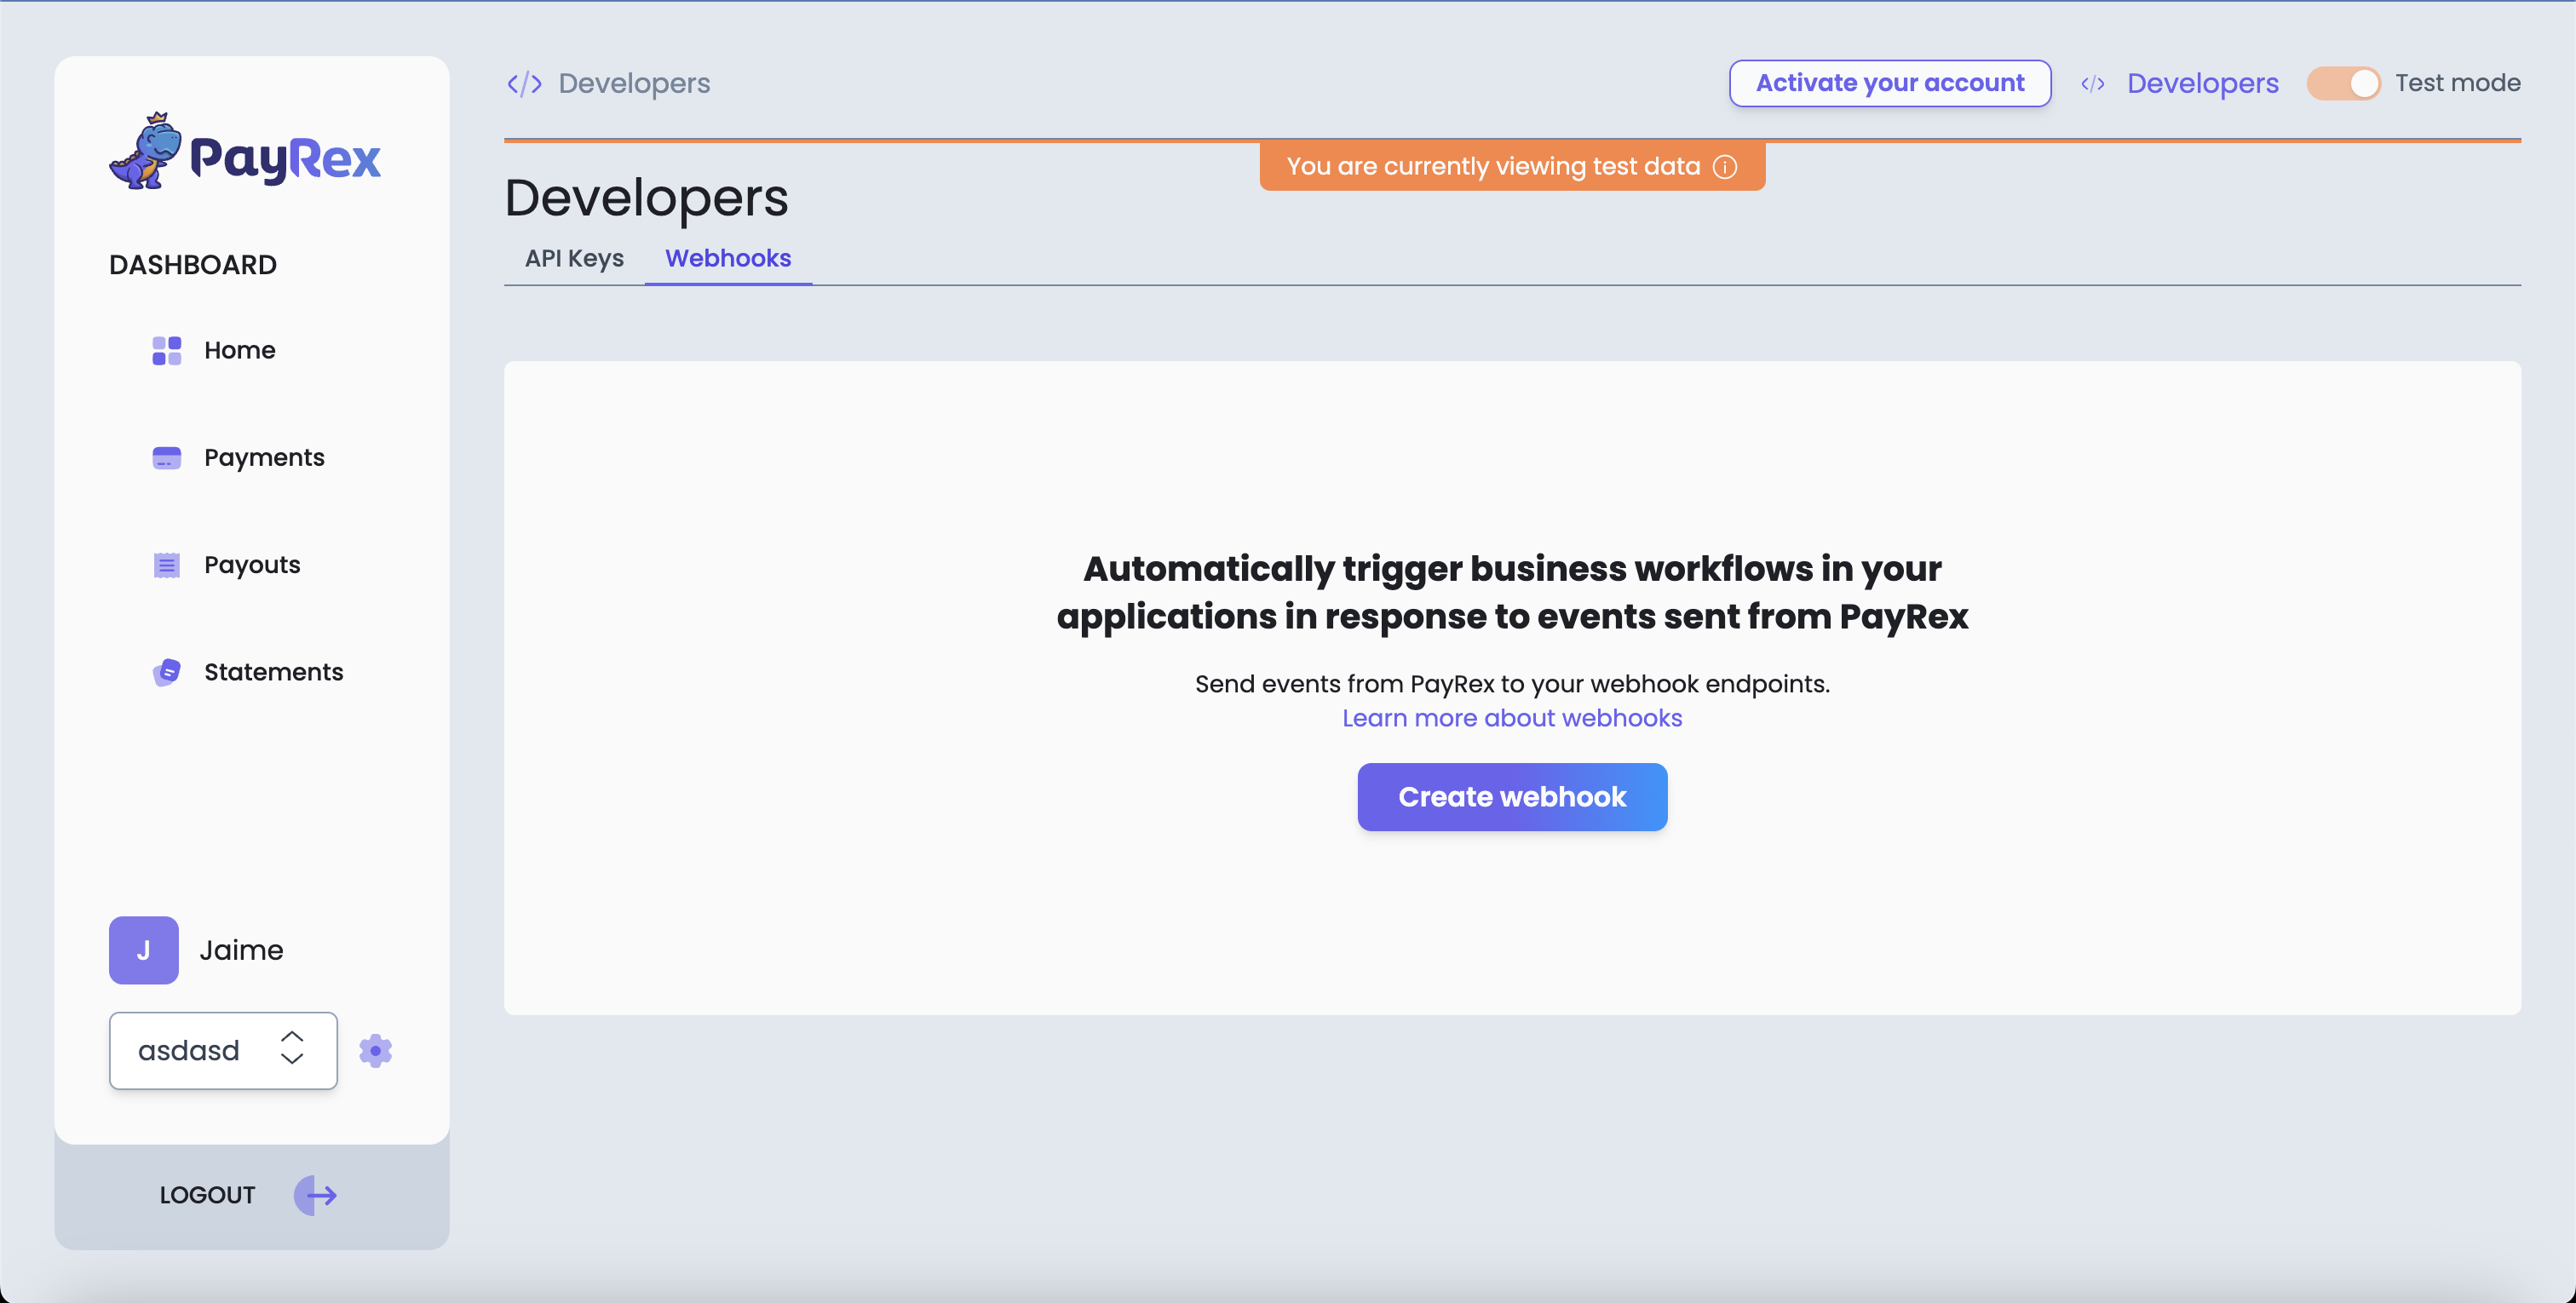
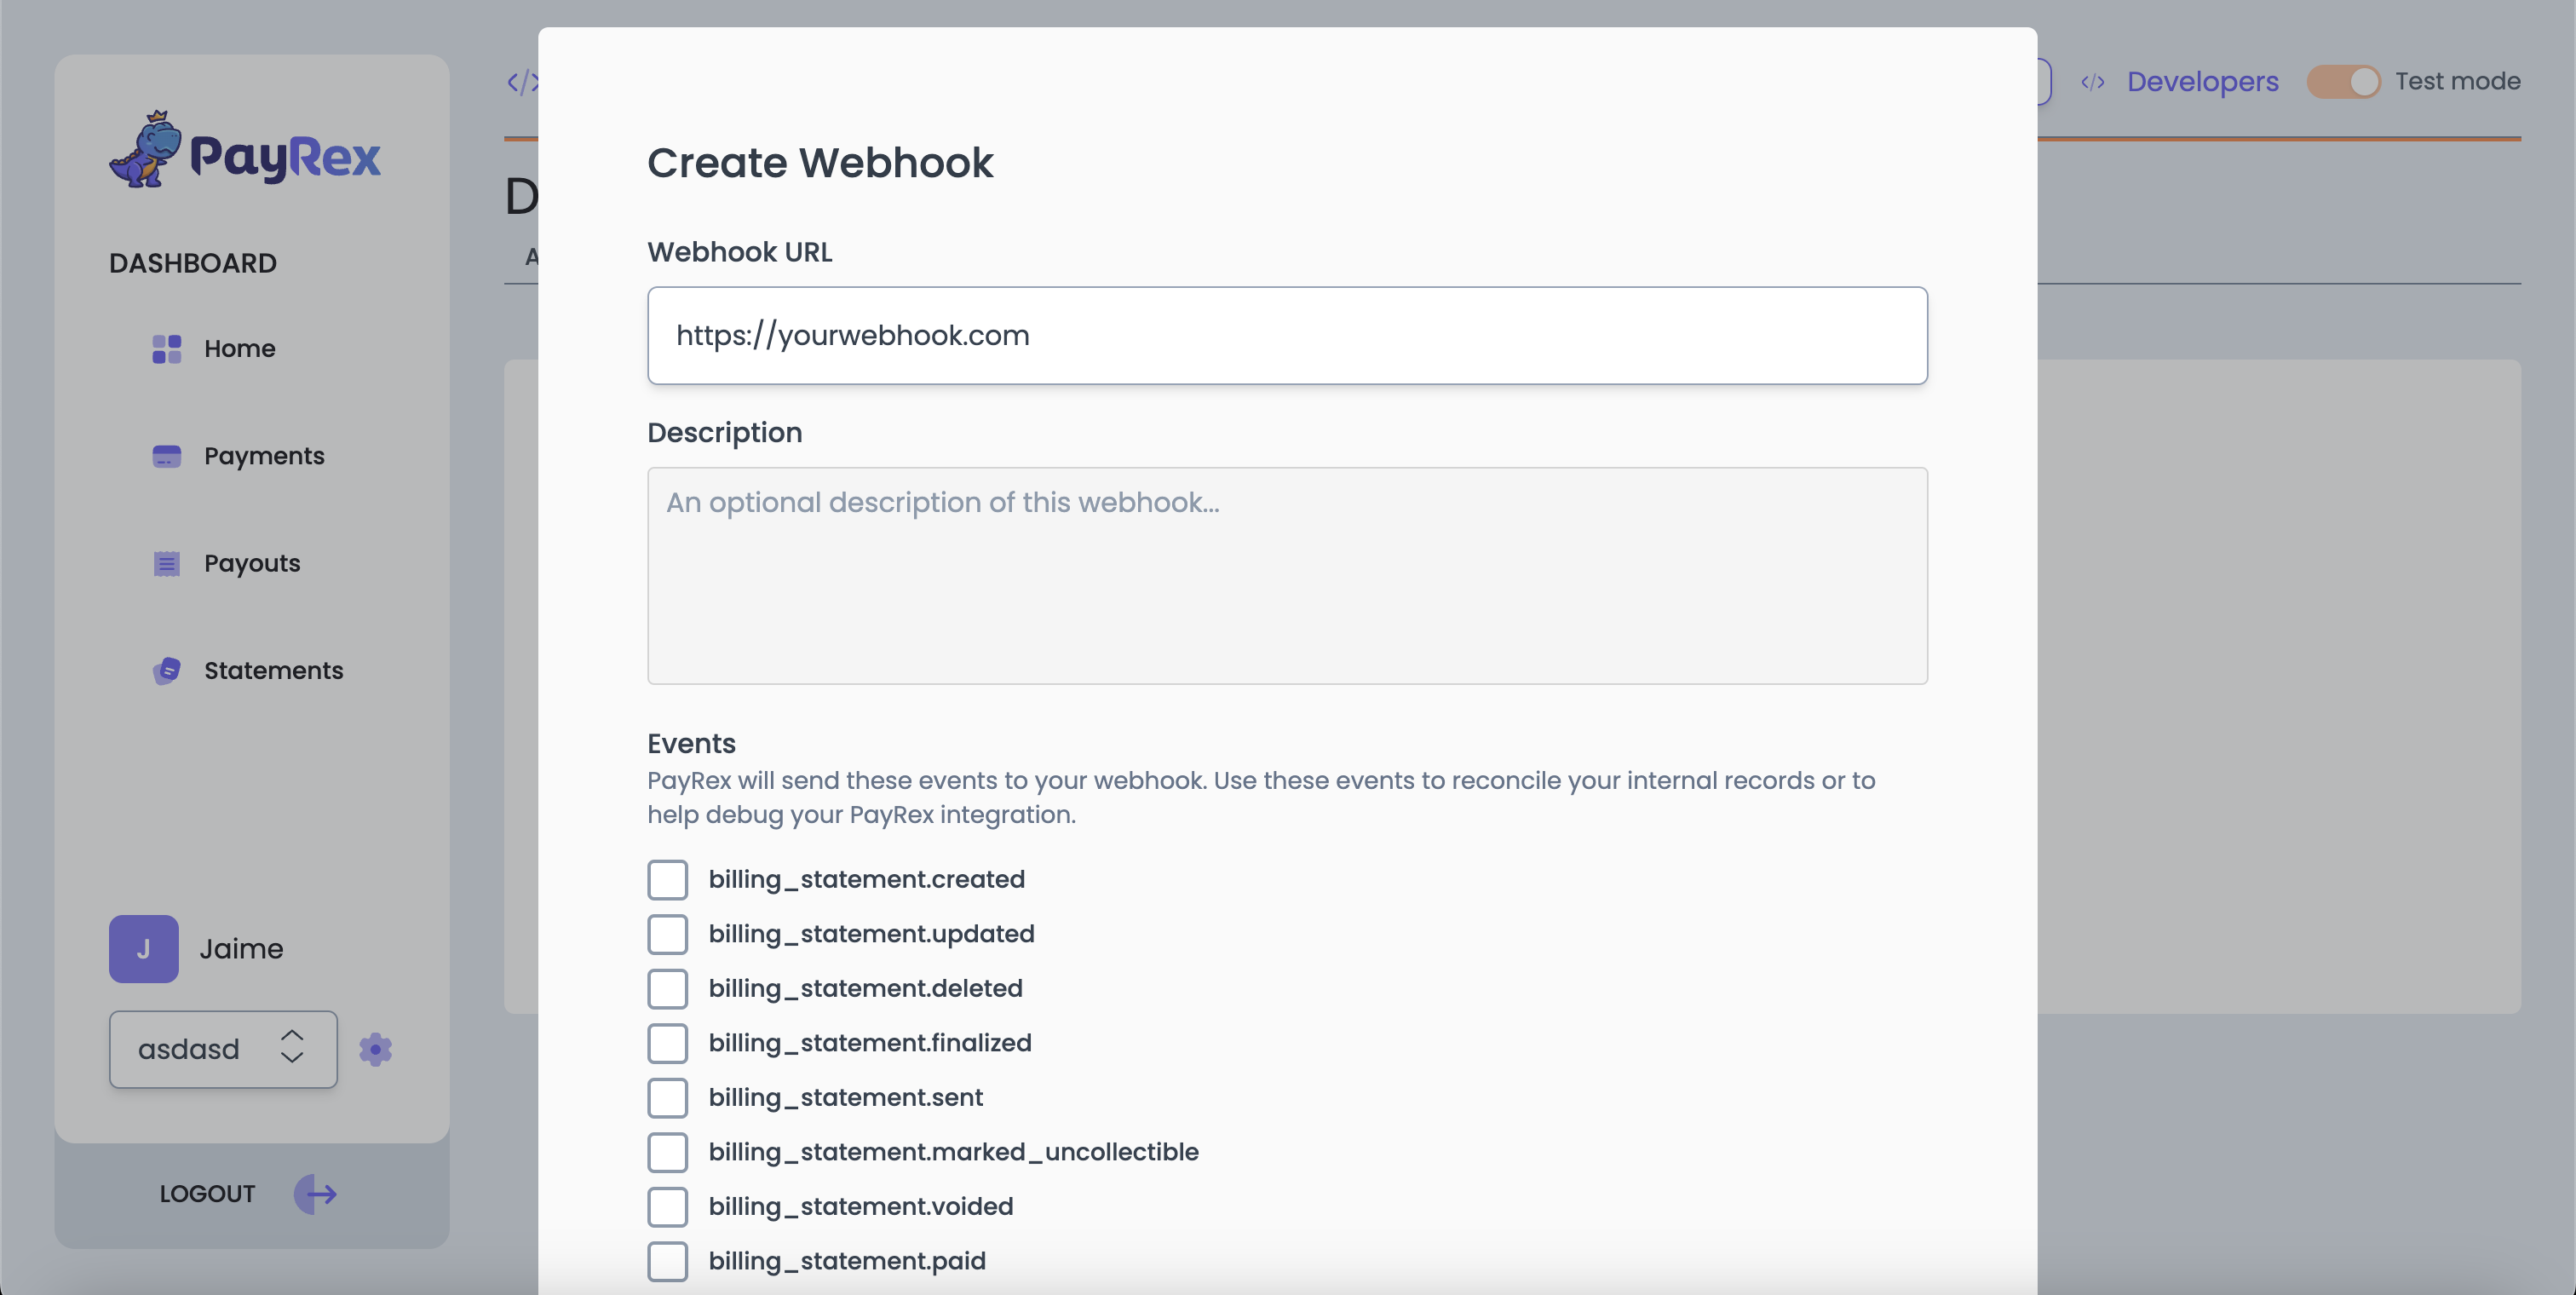
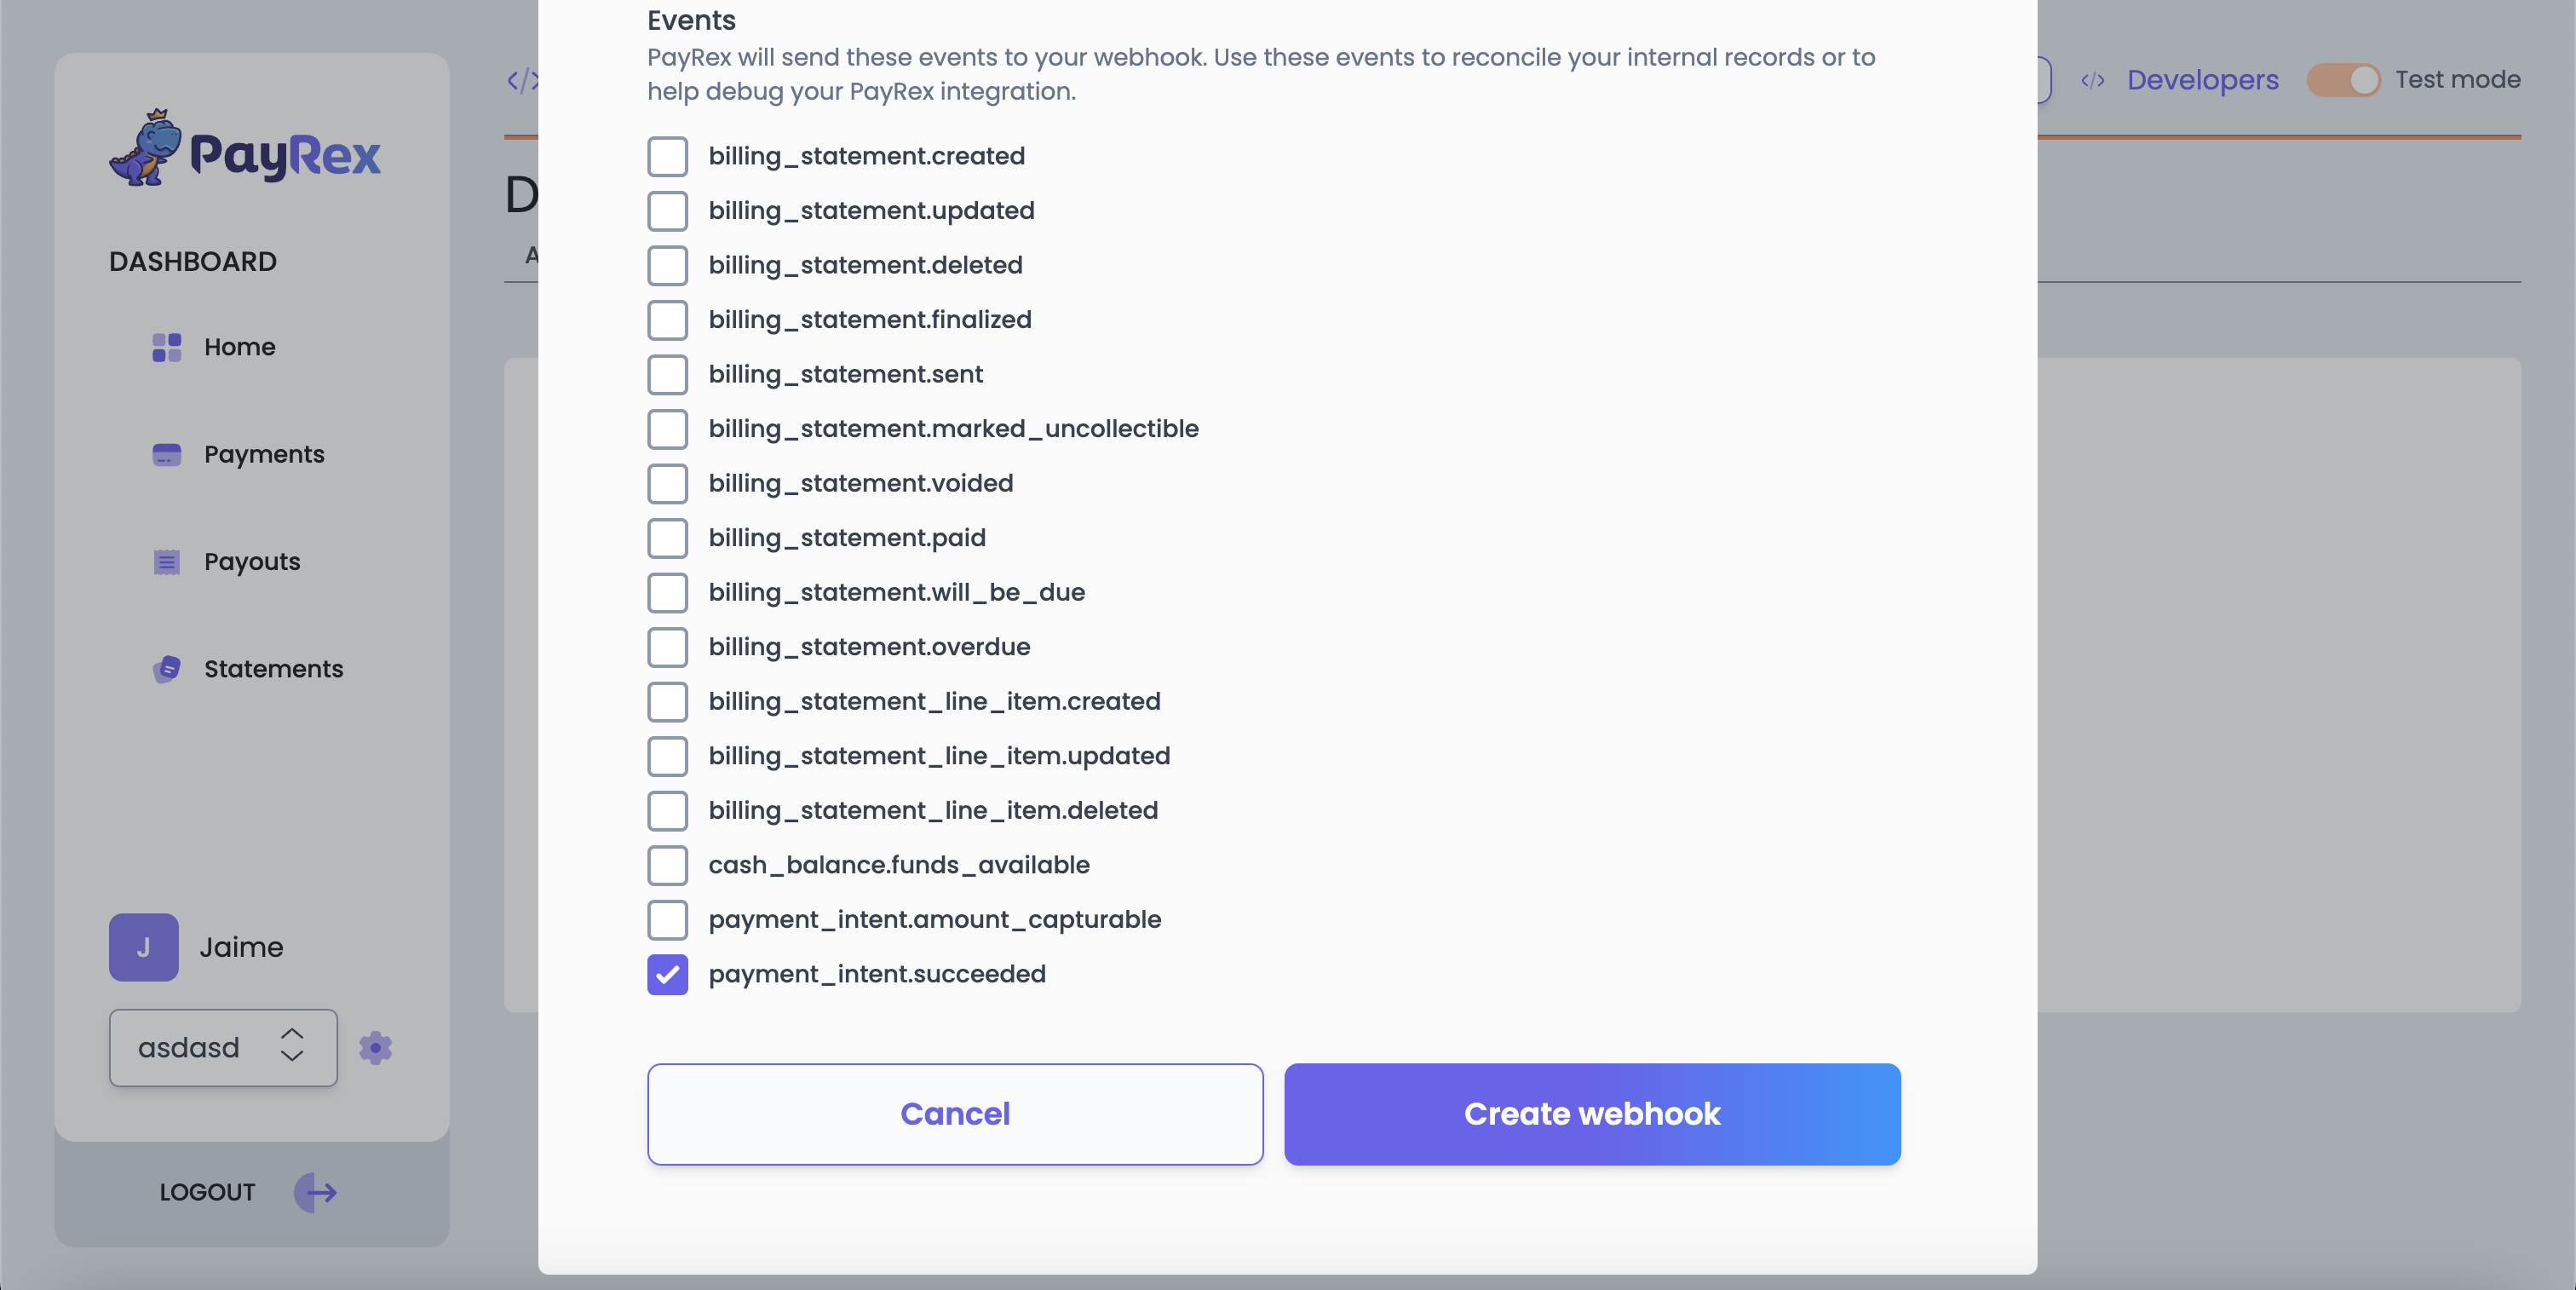
Complete the step by clicking the Create webhook button.
4. Secure your webhook by implementing webhook signature verification
PayRex requires the raw body of the request to perform signature verification. If you are using a framework, ensure it doesn't manipulate the raw body. Any changes or manipulation to the raw body of the request causes the verification to fail.
We highly recommend using our official libraries to verify signatures. Provide the payload sent to your webhook, the Payrex-Signature header, and the webhook's secret key for verification. If verification fails, you will receive an error. To stop receiving the same event, return a 2xx response immediately. Return a 4xx response to retry the event.
- Node
- PHP
- Python
- Ruby
// Protect your PayRex Secret API key at all costs. One common approach is
// storing it in an environment variable.
// Add your PayRex test secret API key.
const payrexSecretApiKey = '';

const payrex = require('payrex-node')(payrexSecretApiKey);

// Highly recommended to store this to an environment variable.
webhookSecretKey = 'whsk_...';

payload = '';
signatureHeader = 't=...,te=,li=...';

try {
  const event = await payrex.webhooks.parseEvent(payload, signatureHeader, webhookSecretKey);

  // Handle the event
  switch (event.type) {
    case 'payment_intent.succeeded':
      const paymentIntent = event.data;

      // Handle payment intent succeeded
      break;
    case 'payment_method.attached':
      const paymentMethod = event.data;

      // Handle payment method attached
      break;
    // ... handle other event types
    default:
      console.log(`Received unknown event type ${event.type}`);
      break;
  }
} catch (error) {
  if (error.name === 'ValueUnexpectedError') {
    // Handle invalid payload
  } else if (error.name === 'SignatureInvalidError') {
    // Handle invalid signature
  }
}
<?php

require_once '../vendor/autoload.php';

// Protect your PayRex Secret API key at all costs. One common approach is
// storing it in an environment variable.
// Add your PayRex test secret API key.
$payrexSecretApiKey = '';
$payrex = new \Payrex\PayrexClient($payrexSecretApiKey);

// Highly recommended to store this to an environment variable.
$webhookSecretKey = 'wh_sk_...';

$payload = @file_get_contents('php://input');
$signatureHeader = $_SERVER['HTTP_PAYREX_SIGNATURE'];

try {
    $event = \Payrex\Webhook::parseEvent(
        $payload,
        $signatureHeader,
        $webhookSecretKey
    );

    // Handle the event
    switch ($event->type) {
        case 'payment_intent.succeeded':
            $paymentIntent = $event->data->resource; // contains a \Payrex\PaymentIntent
            handlePaymentIntentSucceeded($paymentIntent);
            break;
        case 'payment_method.attached':
            $paymentMethod = $event->data->resource; // contains a \Payrex\PaymentMethod
            handlePaymentMethodAttached($paymentMethod);
            break;
        // ... handle other event types
        default:
            echo 'Received unknown event type ' . $event->type;
    }

    http_response_code(200);
} catch(\Payrex\Exceptions\UnexpectedValueException $e) {
    // Invalid payload
    http_response_code(200);
    echo json_encode(['Error parsing payload: ' => $e->getMessage()]);
    exit();
} catch(\Payrex\Exceptions\SignatureVerificationException $e) {
    // Invalid signature
    http_response_code(200);
    echo json_encode(['Error verifying webhook signature: ' => $e->getMessage()]);
    exit();
}
from payrex import Client as PayrexClient

# Protect your PayRex Secret API key at all costs. One common approach is
# storing it in an environment variable.
# Add your PayRex test secret API key.
payrex_secret_api_key = ''
payrex = PayrexClient(payrex_secret_api_key)

# Highly recommended to store this to an environment variable.
webhook_secret_key = 'whsk_...'

payload = ''
signature_header = 't=...,te=,li=...'

try:
    event = payrex.webhooks.parse_event(
        payload,
        signature_header,
        webhook_secret_key
    )

    # Handle the event
    if event.type == 'payment_intent.succeeded':
        payment_intent = event.data

        # Handle payment intent succeeded
    elif event.type == 'payment_method.attached':
        payment_method = event.data

        # Handle payment method attached
    # ... handle other event types
    else:
        print(f'Received unknown event type {event.type}')

    http_response_code = 200
except ValueUnexpectedError as e:
    # Handle unexpected value

    http_response_code = 200
    # exit
except SignatureInvalidError as e:
    # Handle invalid signature

    http_response_code = 200
    # exit
require "payrex-ruby"

# Protect your PayRex Secret API key at all costs. One common approach is
# storing it in an environment variable.
# Add your PayRex test secret API key.
payrex_secret_api_key = ""
payrex = Payrex::Client.new(payrex_secret_api_key)

# Highly recommended to store this to an environment variable.
webhook_secret_key = "whsk_..."

payload = ""
signature_header = "t=...,te=,li=..."

begin
  event = payrex.webhook.parse_event(
    payload: payload,
    signature_header: signature_header,
    webhook_secret_key: webhook_secret_key
  )

  # Handle the event
  case event.type
  when "payment_intent.succeeded"
    payment_intent = event.data

    # Handle payment intent succeeded
  when "payment_method.attached"
    payment_method = event.data

    # Handle payment method attached
  # ... handle other event types
  else
    puts "Received unknown event type #{event.type}"
  end

  http_response_code = 200
rescue Payrex::Errors::ValueUnexpectedError => e
  # Handle unexpected value

  http_response_code = 200
  exit
rescue Payrex::Errors::SignatureInvalidError => e
  # Handle invalid signature

  http_response_code = 200
  exit
end
Manually verifying webhook signatures
If you don't want to use our SDKs to verify the webhook signature, you can verify it with your code.
Below is a sample Payrex-Signature from the HTTP header whenever we send an event to your endpoint.
Payrex-Signature:t=1496734175,te=5242a89e7ecebeda32sffs62cdca3fa51cad7e77a0e56ff536d0ce8e108d8ad,li=5f7bsa9d200aae63f272406069a9788598b792a944a07aba816edb039989a3n
Payrex-Signature is composed of three parts separated by comma ,:
tis the timestamp of when we sent the API request.teis the test mode signature of the API request.liis the live mode signature of the API request.
li vs te
Generate a signature using the Webhook resource's secret key and compare this to the respective mode's value. You must compare the signature that you will generate against the li's value if the event is in live mode or te if in test mode.
- Split
Payrex-Signatureinto three parts:t,te, andli. Use a comma,to separate the timestamp and the signatures for live and test modes. - Concatenate the following to create your own signature:
- The timestamp as a string, e.g. 1425714124
- A period
.character - The JSON payload of the request you received from PayRex. You must use the raw payload of the request. Check the documentation on the programming language or framework you're using to get the raw payload of an API request.
- Run the concatenated values through HMAC with SHA256 hash function with the webhook's secret key as the cryptographic key.
- Compare the signature you created from step 3 against the signature from the
liif the event happened in live mode whileteis for test mode. If they do not match, discard the request. This means PayRex did not send the request to your API endpoint.