Manage Pages via Dashboard
On this section, you will learn how to create and manage your pages via Dashboard.
Managing pages via Dashboard is a quick way to test and try pages. This approach is a no-code tool; you don't need to write code to use pages.
If you want to learn about the general overview of pages, you can refer to this link.
1. Create a PayRex Page
Go through the following steps to create a page:
- Once you log in via Dashboard, go to the Pages module and click the Create Page button.

- Choose a page template that best fits your payment acceptance needs.
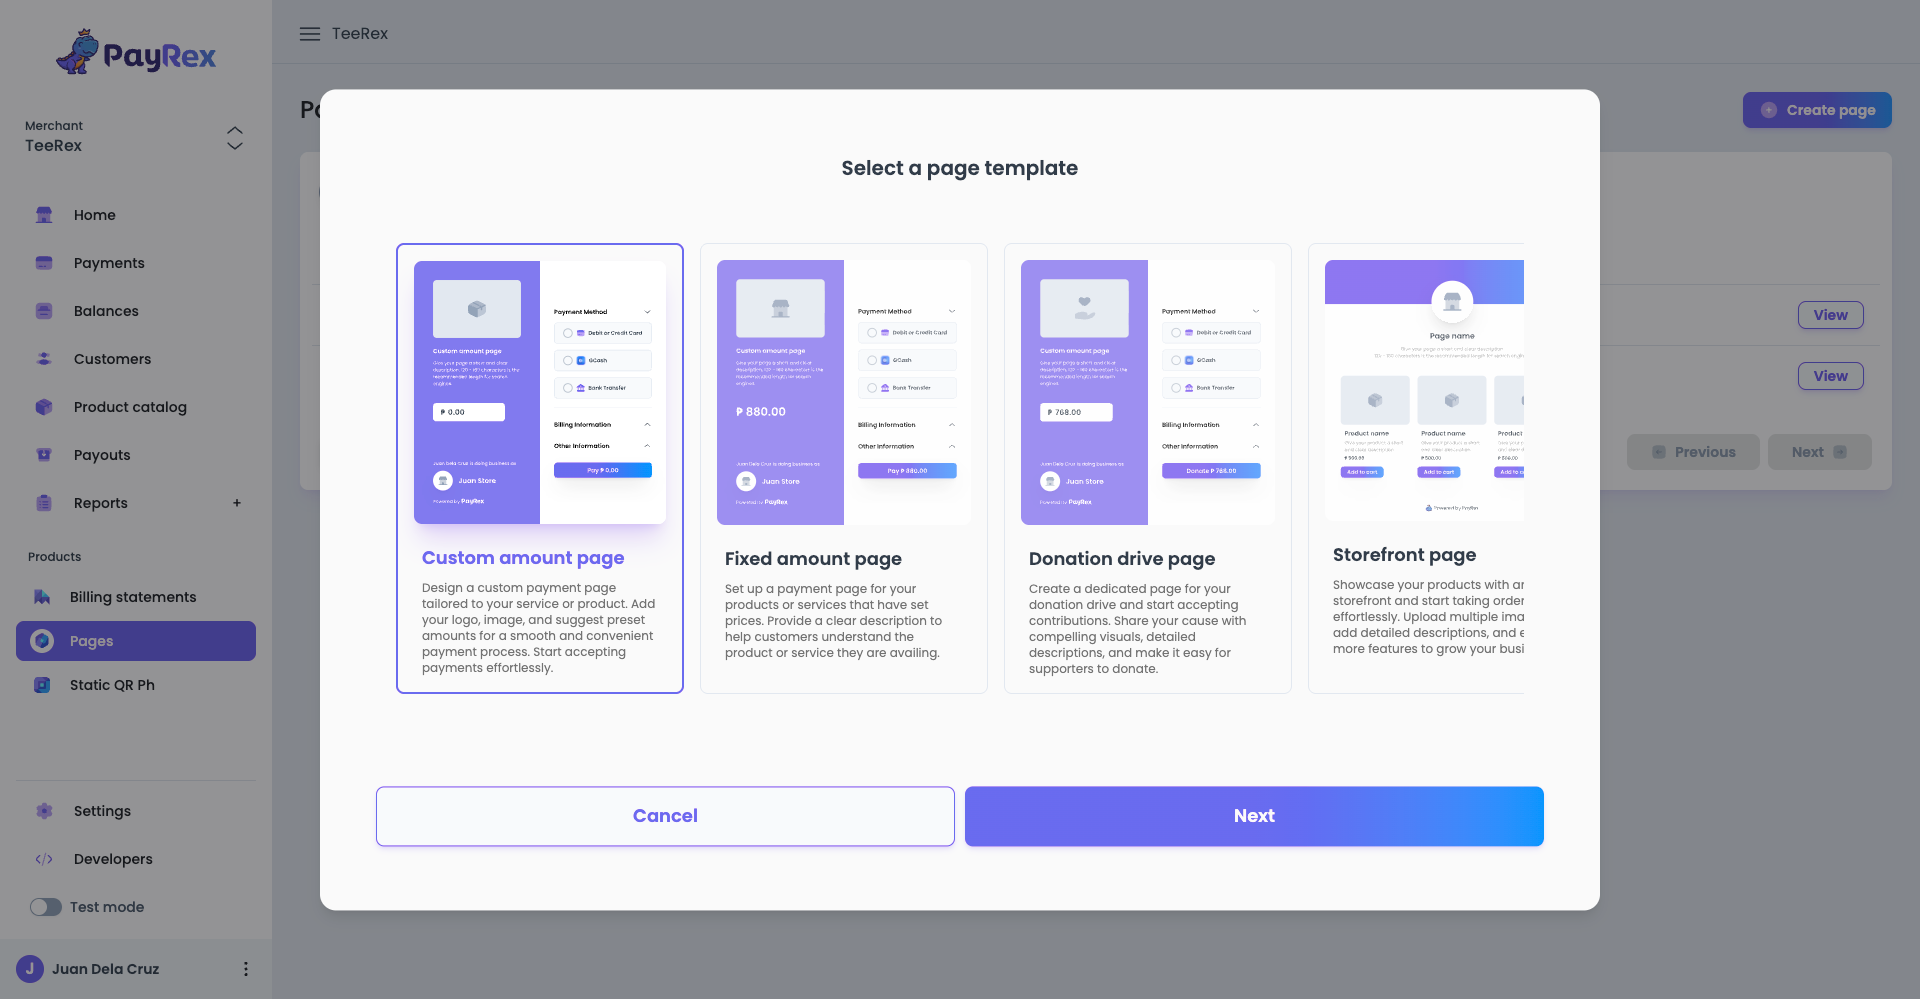
Read more about our page templates here.
- Fill out the following fields to create your page:
- Name: The label to identify the page you are creating.
- Amount: The fixed value you want to collect from your customers. This is only applicable for templates with fixed amount.
- Description: A short summary of the purpose of the page you are creating.
- Handle: A unique identifier for your page that will be part of its generated URL..
- Payment methods: Select the payment methods that you want to allow your customers to use for their payments.
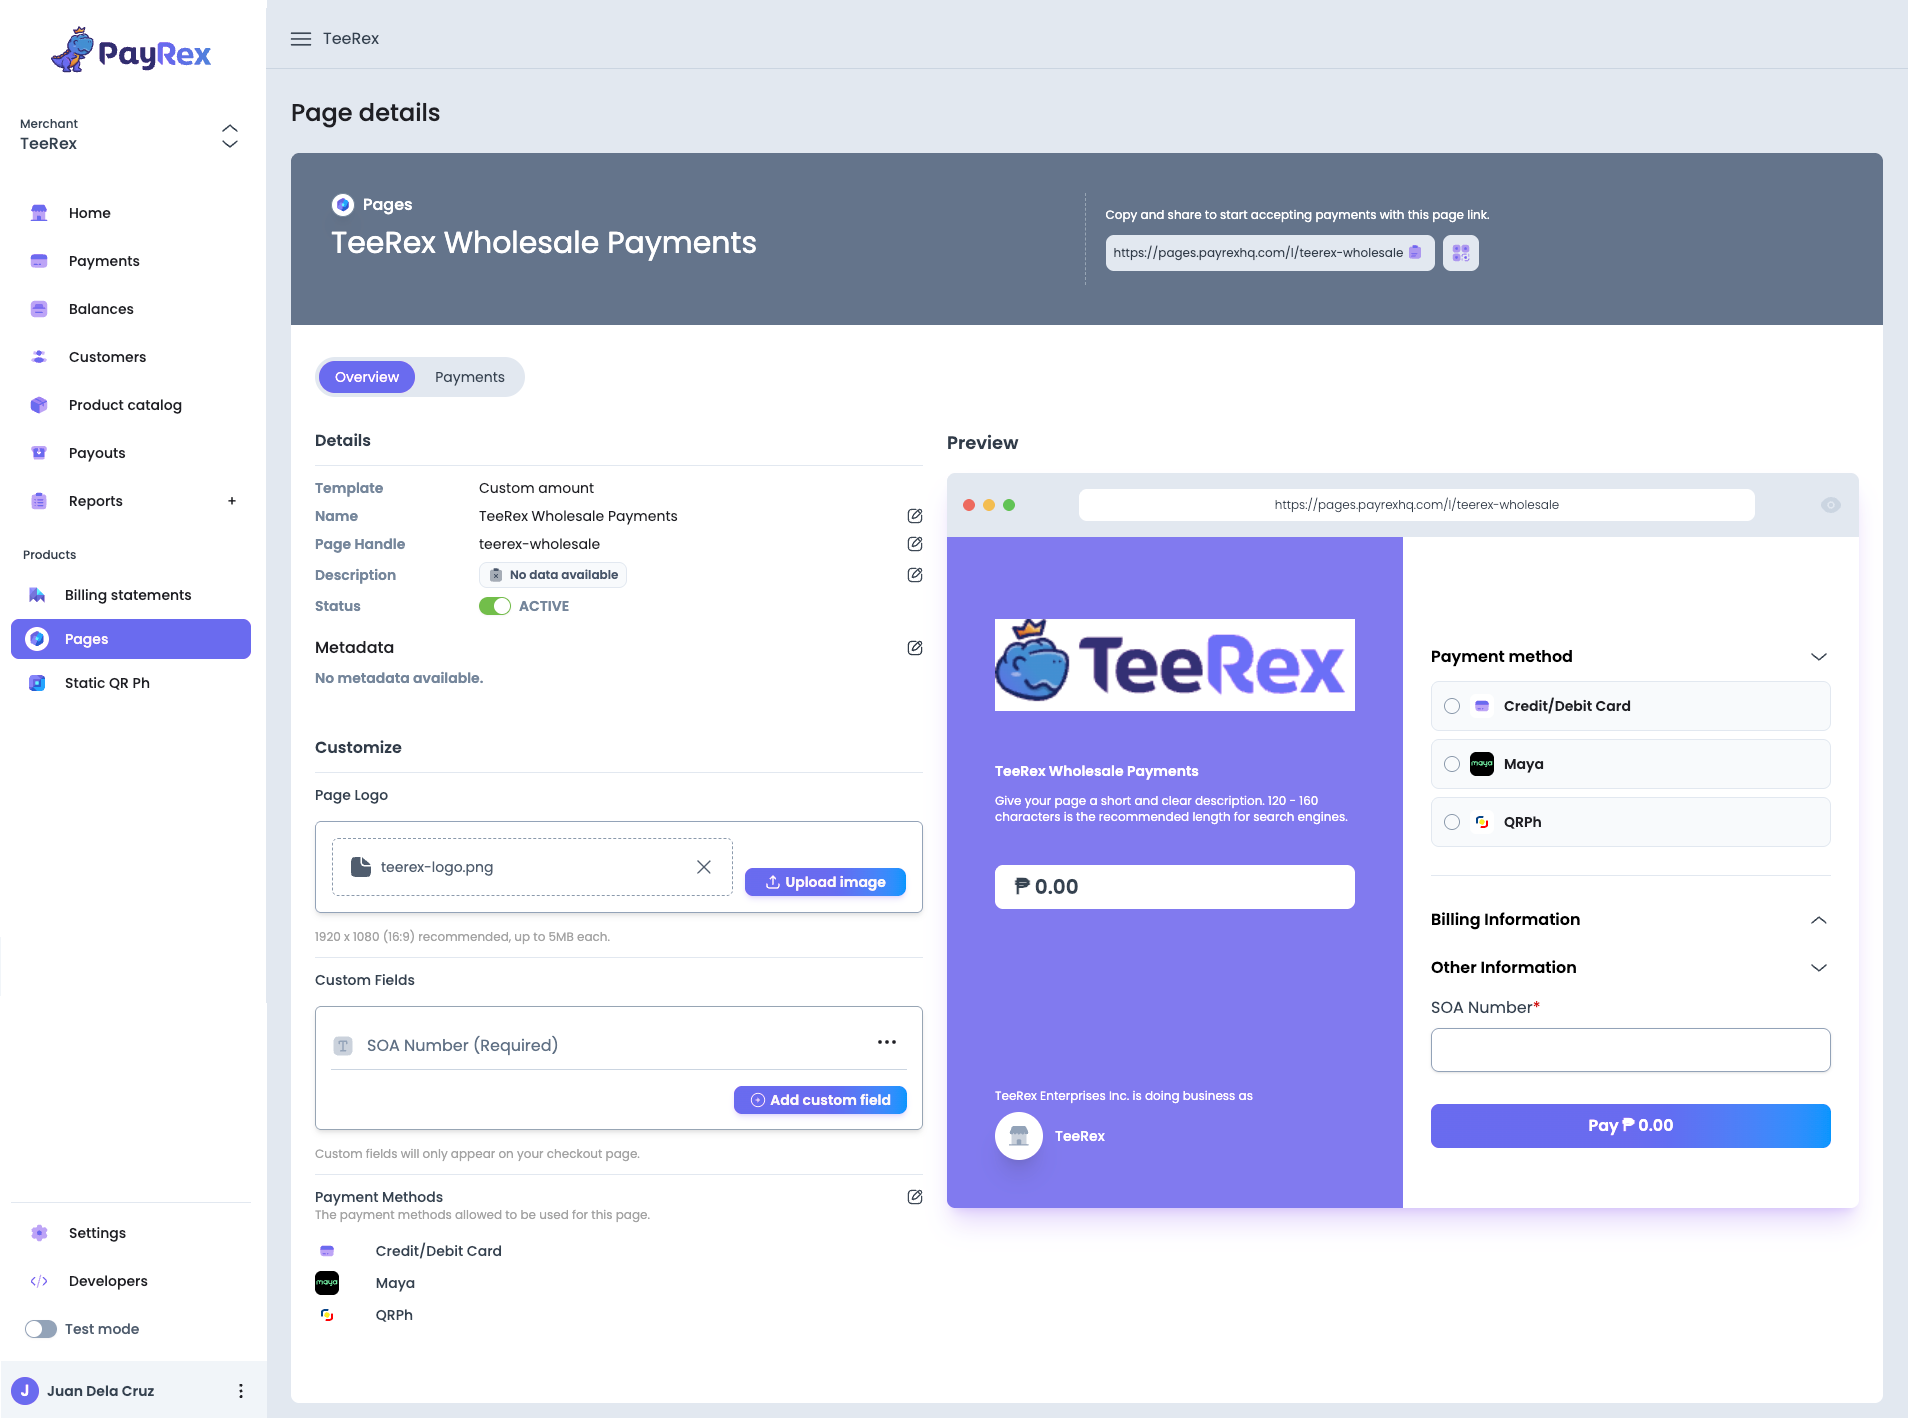
When you update the fields, the preview pane will reflect those changes:
You can personalize the logo, custom fields, and other details on your page once it has been created.
- After you create the page, you will be redirected to its details page where you can add or update its fields.
These are the available fields per template:
| Template | Page name | Amount | Description | Handle | Logo | Custom fields | Payment methods | Products |
|---|---|---|---|---|---|---|---|---|
| Fixed amount | ✔️ | ✔️ | ✔️ | ✔️ | ✔️ | ✔️ | ✔️ | ✖️ |
| Custom amount | ✔️ | ✖️ | ✔️ | ✔️ | ✔️ | ✔️ | ✔️ | ✖️ |
| Donation | ✔️ | ✖️ | ✔️ | ✔️ | ✔️ | ✔️ | ✔️ | ✖️ |
| Storefront | ✔️ | based on each product | ✔️ | ✔️ | ✔️ | ✔️ | ✔️ | ✔️ |
| Ticket selling* | ✔️ | based on each product | ✔️ | ✔️ | ✔️ | ✔️ | ✔️ | ✔️ |
* coming soon
While it is still possible to update most of the page details, changing the selected template is not allowed once you created the page. If you need to use another template, feel free to create a new page.
2. Share your page to your customers
By default, the page you create will be set to active. This means that your customers can access the page right away once they have the link to it.
- Copy the page URL and send it to your customer via email or IMs such as Viber, Messenger, etc.
- If you need to make further changes to your page, you can temporarily set its status to inactive so that it can be inaccessible until you are satisfied with its details.
- Don't forget to re-activate the page so that your customers can access it again to pay for your products or services.

- PayRex also provides a QR code that your customers can scan with their phone's camera so that they can easily access your page.

- Download the generated QR code so you can post it on your online business profiles.
- Alternatively, you can print a hard copy of the QR code and display it at your physical store so that your walk-in customers can easily access your payment page.
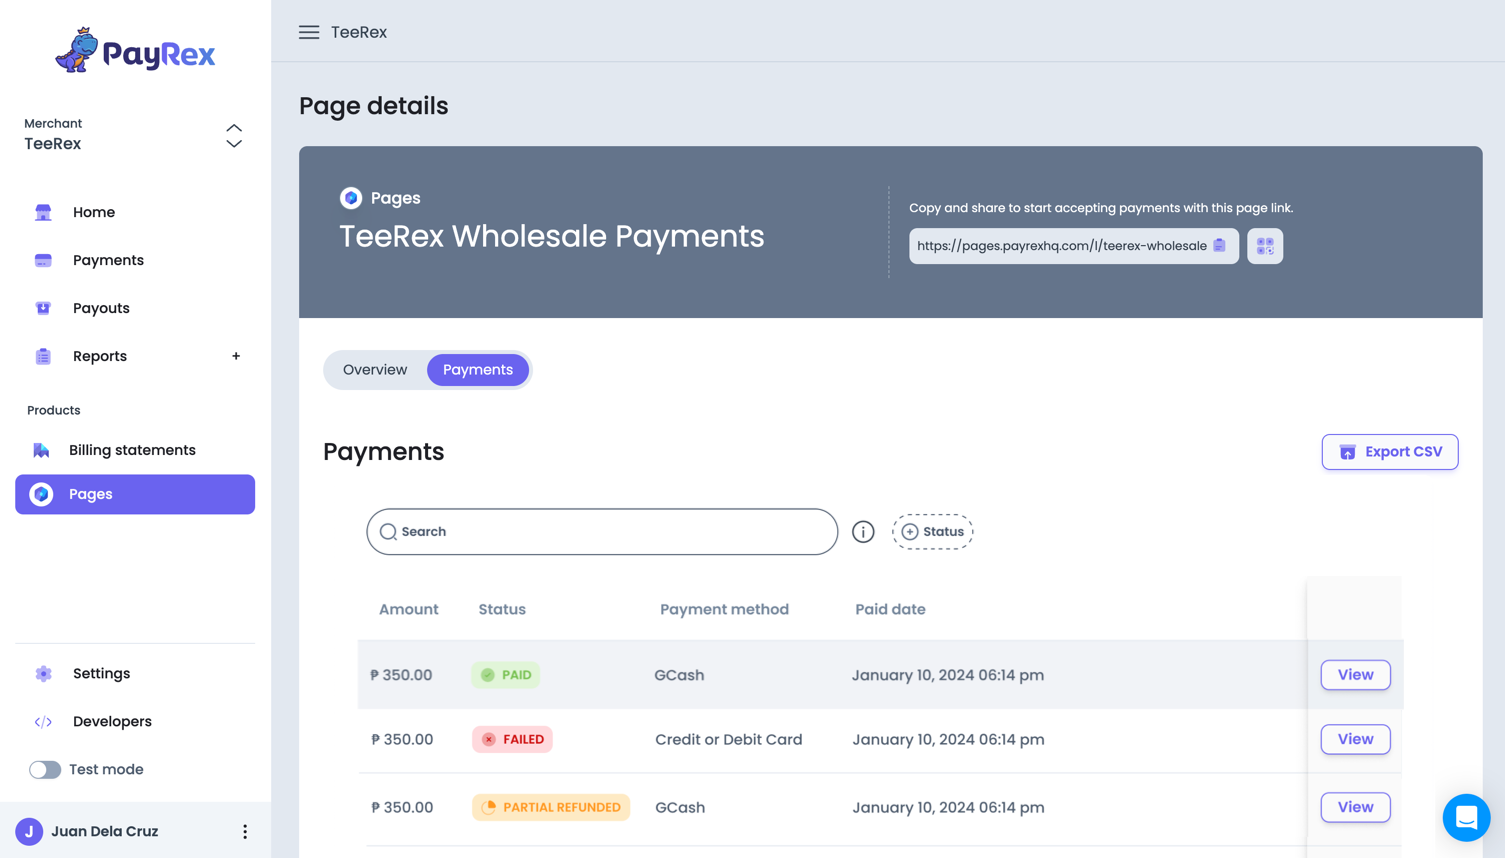
3. Wait until your customers complete their payments
Unlike billing statements, Pages are reusable and can receive payments from different customers. Once your customer accesses the URL, they can complete their payment. Both successful and failed payments made through the payment page will be displayed in real-time on the Payments tab.